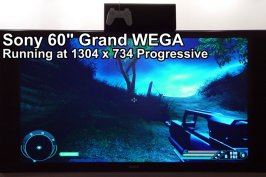
Here are the steps I took to make PC monitor viewing possible on my TV at 1304x734 resolution using a Moster DVI-400 cable from my ATI's DVI output to my TV's DVI input.
Items you will need:
- ATi Catalyst Drivers (
www.ati.com)
- Powerstrip (
www.entechtaiwan.net/ps.htm)
- DVI-D to DVI-D (Single or Dual) Cable (If you don't spend at least $60 on this cable, then you will regret it, I promise.)
- Patience
Steps:
1. First, hook up your PC to the TV using the S-Video connection method. Verify that the DVI (or other monitor) cable is not connected to the ATI card.
2. When your PC boots up, uninstall all instances of ATI software on your machine (including drivers). ATI has a utility that will allow you to do this easily (
http://www2.ati.com/drivers/cat-uninstaller.exe)
3. After the uninstallation is complete, reboot your machine WHILE LEAVING the s-video connection plugged in.
4. When the system boots up, it will of course see all of the new hardware and attempt to locate drivers. Cancel out of all the windows that pop-up (quite a few will pop-up if you are using an All in Wonder series).
5. After that is all done, install the ATi Catalyst drivers that you downloaded from ATI.
6. Reboot the machine WHILE LEAVING the s-video connection plugged in.
7. When windows comes back up, install powerstrip. (don"t bother rebooting the machine if it asks)
8. After the installtion of powerstrip is completed, right click on your desktop and select Properties.
9. Click the Settings Tab > Advanced > Monitor > Properties > Driver > Update Driver
10. Select the 2nd bullet (Install from a list or specific location). Click Next.
11. Select "Don't Search, I will chose a driver to install"
12. Uncheck the box that states "Show compatible hardware"
13. On the left side, select "SONY Corporation"
14. On the right side, select "Sony GDM-FW900"
15. Click Next, Finish, Close, OK.
16. Verify that Powerstrip is running by looking in your taskbar for the icon.
17. Right click on the powerstrip icon in the taskbar - Select Display Properties - Configure...
18. Click the "Advanced Timings.." button
19. Click the "Custom Resolutions" button
20. Select the "User defined" radio button
21. Open Notepad (Start > Run > notepad > enter) and type the following: 1304x734=1304,64,40,240,734,11,5,23,74160,6
22. Highlight the line you just typed and copy it to the clipboard (Edit > Copy)
23. Back in powerstrip, on the right-hand side you'll see an icon that has a clipboard and says "Paste" when you roll over it. Click that button.
24. Click the "Add New Resolution" button
25. From here you will get one of two options,
A) Your display driver has successfully recognized the new resolution
or
B) Something about needing to reboot to try it out.
26. In either case, shut down the machine completely.
27. Unplug your s-video connection
28. Hook your PC directly up to the GWIII by using the DVI cable (expensive one remember)
29. Boot up the machine. It should put you in an ugly 640x480 resolution.
30. Right click on your desktop, select "Properties" and then advanced.
31. See if the new resolution appears (1304x734). If it is, select it and hit apply and wait for the screen to attempt to sync up.
If the new resolution does not show up, Right click on the powerstrip icon, Select Display Properties and then Configure...
Attempt to change the reolution in the upper right corner (you might have to uncheck the box on the left that says "Hide modes not supported by monitor"
Click Apply
32. If the resolution changes, then you are all set to begin getting everything lined up.
---- CAUTION ----
The steps below require the use of the service menu, please make sure that you note each value before attempting to make a change, in case you need to go back for some reason.
33. Turn off your Grand Wega III and wait 5 minutes (for it to do a proper shutdown of sorts)
34. On your remote, press the following keys in the order in which I state and then hit the power button:
DISPLAY > 5 > VOL+ (Remember, these don't need to be held down, just pushed and released in that order)
35. TV should turn on with a bunch of green crap in the top half of the screen.
36. You will need to set the following: MID4:1 (horizontal size) to 171 and set MID4:3 (vertical size) to 192. Then center the image using MID4:0 and MID4:2
The following is an excerpt from raymod2 describing the use of the service menu, please use it wisely:
To enter the service menu first turn off the TV. Then press "DISPLAY" - "5" - "VOL+" - "POWER" on the remote. The TV should come back on in service mode. Each setting is called an "item" and they are grouped in "categories". You use the 1 and 4 keys to scroll through the items. You use the 2 and 5 keys to scroll through the categories. You'll notice that each item in a category has both a number and a 4-letter name associated with it. So when I refer to MID4:0(DHPL) I am referring to item 0 (which is named DHPL) in the MID4 category. When you find the correct item you adjust it with the 3 and 6 keys. When you are satisfied with your change you must press "MUTING" - "ENT" on the remote to save it.
The layout of the screen in service mode is as follows:
CATEGORY....................ITEM NUMBER....................VALUE
ITEM NAME
Note that there may be multiple values associated with a single item. For example, switch to your DVI input and then go to MID4:0(DHPL) and look at the value stored there. Now press "TV/VIDEO" on your remote and switch to your ANT input. It looks like the value stays the same but that is just because the service mode software is too stupid to refresh the value. Scroll up one item and then back down to force a refresh. You will notice there is a new value there. So make sure you are on the correct input and in the correct mode when making your changes.
Credits go out to the avsforum and it's members for making this all happen.


")


 No, not quite pnp. Sony actually states that this TV is NOT compatible with computer signals. If pnp is what your after, certainly a TV with compatable connections is manditory. Originally, computer hookup was a secondary task. Now, however, I am finding that I am using it more and more as a computer monitor. I have DVD playback now that's superior to my stand alone DVD player, great graphics for games, ect. Lookin into a HD Capture card for recording HD broadcasts on the computer. I have about $2K into my computer, but could easily build a HomeTheater PC for under $700 that would be superior to most stand alone player.
")