TUTORIAL #3: AFFINITY DESIGNER
Now let's focus on manually tracing a logo, and the tools you'll use! This tutorial was written by @Belifant  Affinity Designer
 can be downloaded for Windows and Mac OS, and is the cheapest alternative of the three applications we've covered, reasonably priced at $49.99. It does not feature a monthly subscription, so you can jump right in without a worry about affording the next month! You can buy it directly on their site for the Windows version, or in the App Store if you're using Mac OS.
Without further ado, let's start!
Basic introduction into Affinity Designer:
Shapes vs. Curves
A curve is an
open path that has a distinct start and end. These end points are defined by
nodes. The path between nodes is known as a
segment and can be straight or arched. A shape is a
closed path with no discernible start or end. It is made up of multiple nodes and segments.
In Affinity Designer, there is another difference between curves and geometric shapes: curves are editable paths where you can change anything you want. Shapes are pre defined sets of curves, for example a rectangle, where you have options to edit the shape as a whole and, depending on the chosen shape, have different options to change that shape, for example, add rounded corners to the rectangle:
This lets you create very different shapes and designs very quickly, but in order to access the full control over that shape, it has to be converted into a curve.
For creating a vector curve, we will work with the Pen Tool (P) and the Node Tool (A). Basically, the Pen tool is to create/convert points, the Node tool is for moving and editing them. Even though they are two separate tools, there is no need to switch between them. While the Pen tool is active, holding Command/Ctrl will temporarily activate the Node tool. Released, it will return to the Pen Tool. To move and scale complete shapes, we can use the Move Tool (V).
Basic functionality of the pen tool and node tool:
Mouse click: creates a point. Move cursor to another position and click again, creates a new point and a straight line between them.
Mouse click and drag: creates bezier handles. Necessary to create and control curves.
Hold Command/Ctrl: temporarily activates the Node Tool.
Hold ALT: splits the bezier handles. Ideal to make sharp corners.
Hold Shift: restrains the curve to standard axis.
This is the very basic functionality. For an in depth explanation on the Pen and Node tool in Affinity Designer, please see this very good website:
https://www.shortcutfoo.com/blog/affinity-designer-pen-and-node-tools-tutorial/
For a more application independent learning of the curves and points, please try this fun little game:
http://bezier.method.ac
If you use another application, the basic principle of the above is the same everywhere.
Vectorising a logo:
We will use 3 different methods for the creation of this logo. These methods are available in all vector applications and are used for almost anything.
We will:
- use shapes, and edit them.
- draw curves with the Pen tool.
- use boolean operations (using a shape to do something to another shape, like deleting parts of it)
Now let’s get started:
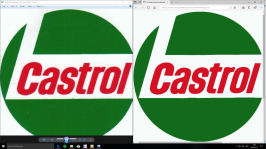
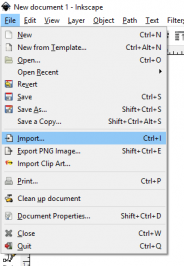
Drag your raster image you like to vectorise into Affinity Designer. Vector files are resolution independent, so the size of your document does not matter. The image will be placed on a pixel layer. Click on that layer in the Layer's panel to activate, then click the lock sign to freeze it, so this layer doesn’t get in our way. Add a new layer by clicking on the layer icon at the bottom of the Layer’s panel.
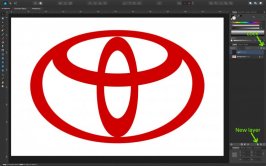
We will use Shapes where we can and if necessary, modify them to fit the design. Let’s start with the main ring. Drag out a circle and fit it as close as possible. We may have to change the appearance of the shape, so in the color panel, disable the fill color and add a black stroke, in order for us to see our curves better. As you can see, our circle does not fit the logo perfectly, so we will convert our circle to a curve in order to edit it. Click the „Convert to Curves“ button on top of the main view.
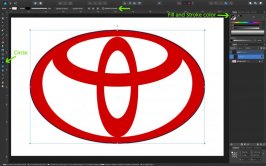
Having done this, we are getting 4 edit points for the circle. Change to the Node tool (A) and click the right edit point on the circle. Additional handles will appear. Dragging either the upper or lower handle point, we are able to change the curvature of the circle. Click on the upper handle point, hold Shift (to restrain the movement to the vertical axis) and drag it up until the curvature matches the logo. Do the same on the other side.
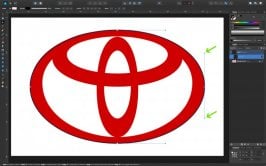
After you have done this, copy/paste this circle and do the other shapes, except the centre vertical one. For moving shapes around and adjust their size, you can also use the Move Tool (V)
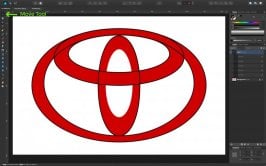
The whole logo could be created just with using these circles, but we will draw the centre vertical part ourself. Grab the Pen Tool (P) and start drawing out the upper „triangle“. Because there are no straight lines, we will need to click and drag in order to create curved lines. Start click and dragging on one corner, go up to the top, click and drag, go down and then click on your starting point to close the curve. Don’t try to match the curve perfectly at this stage. It may look like something below and that is fine, we will edit the curve after the creation.
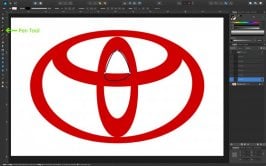
We use the same technique as we did for the circle shapes above. Click on points with either the Node Tool (A) or the Pen Tool (P)with pressed Command/Ctrl button, activate the curve handles and drag them so the curve fits the logo. As you can see, the two bottom points are having sharp corners. So far, we have always affected the curves on both sides of the edit point. In order to only change one side, hold the ALT button and drag a handle. Once finished, do the same for the lower part.
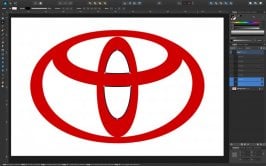
We have created all our curves now. It looks good so far. Now, we want our logo to be filled red, and don’t have the black outline, so let’s do that from the color panel. Remove outline color, and fill all shapes with red.
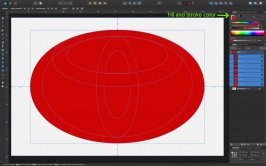
Not really what we wanted. We want some parts of it to be transparent. That’s where boolean operations come into place. We want to add or subtract some shapes from the others. Let’s start with the most outer shape again. Select it, and then select the next inner one. With those two selected, click the subtract button on top of the main view, and the inner circle will be subtracted from the outer circle. This is what we get now:
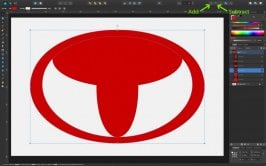
Now we need to do the same to the other shapes, either add or subtract them from each other. Select two curves, and click either the Add or Subtract button. Note that the order you do this matters, and also the layer’s position in the stack. You may have to experiment a bit to get the result we need. The above layer will be the cut out for the below layer, so if you get undesired results, you may have to put the layer you want above or below the other. Having done all this, we get one single shape, our final logo:
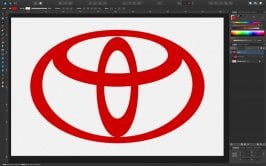
If, at any point, you want to see the just the curves points you have created, you can activate the layer, and then hit Command/Ctrl + Y, to see the lines:
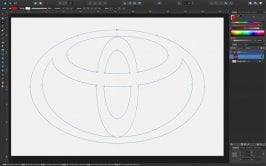
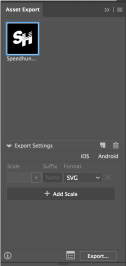
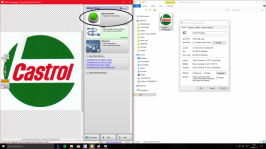
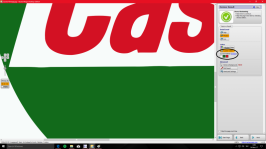
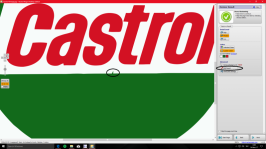
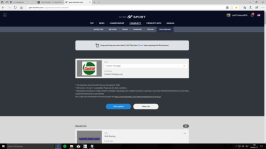
It’s not quite perfect yet, there are some points we could delete to optimise it further, but let’s see if it is even necessary to make the file size smaller. Let’s export the logo so we can use it in Gran Turismo Sport. Go to Export from the Menu, chose SVG for web. As you can see, we are at less than 2 kb, way below the 15 kb limit of Gran Turismo Sport. Just hit export, save the logo to a location and you’re done.
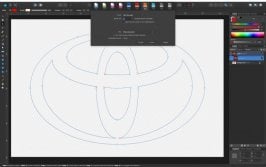
If this was a bit hard to follow from screenshots and text alone, I have also recorded a video of the whole process:
Enjoy making decals for Gran Turismo Sport!
Good sites to find pre-made vector logos:
WorldVectorLogo
Brands of the World
Logopedia
Instant Logo Search
Wiki Commons


