Firstly apologies for the delayed arrival of this post. My original plan had been to put this up alongside my recent livery releases before I left for a week's holiday in Lanzarote, but the week's events conspired against me. The day I'd set aside for catching up on the Livery Editor was spent in bed with a temperature and flu-like symptoms thanks to the freezing weather trackside at Donington Park for Rounds 4-6 of the BTCC.
There's nothing worse than coming down with something just before you're due to go away and after all the time and effort my latest livery had taken I was doubly gutted that I couldn't share the story as it went live in-game. But just over a week and a half later than planned (and ironically drafted on the Notes app on my iPhone during a quiet moment whilst my wife was having a post-swim siesta) here is my latest update...
In Pursuit of Perfection

Initially I was unsure in which order to post things up, as alongside my latest creation, I re-released 4 of my previous Nissan liveries all with varying degrees of tweaks and changes to bring them up to date. Whilst I want my 'main event' to take centre stage I also want to ensure that on my constant quest to deliver accurate liveries that some of these smaller changes don't get ignored.

Why keep re-visiting and re-releasing the same old stuff I hear you cry?! Well the answer is simple and one I'm sure a number of you can relate to. Quite often, after finishing a design, I spot areas that can be improved. Whether that's a result of stumbling across a new gallery of images that show all the angles you struggled to cover before or you accidentally finding that decal or font that had alluded you first time round. A lot of people would let it slide "I've already done 'that one' once, no need to revisit it!" etc etc but for me, I enjoy the pride and satisfaction of knowing I've produced the best I can do, so even if it's just a tweak to the smallest of decals, my OCD is far happier in the knowledge that it's been updated.
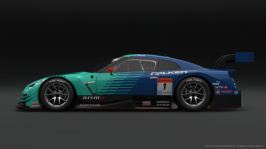
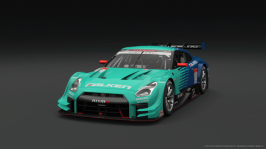
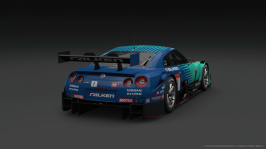
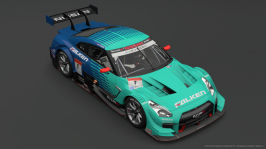
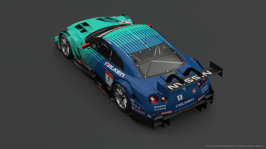
 Nissan NISMO GT-R '16 Gr.2 - Falken Super GT (1.04 SM)
 - I previewed this update in my last big post and it's actually handy that I was delayed in posting it up as the 1.17 update brought the chrome headlight vanity trims back to custom liveried cars (meaning the ones I'd created were now redundant and could be taken off). As I'd mentioned previously, this was more of a subtle evolution of the initial design seeing slight tweaks to the shape of the NISMO bumper elements and layout of the minor sponsor decals. I also corrected a couple of areas where the body colour decals bled into unpainted matt black lower body.
Download Here
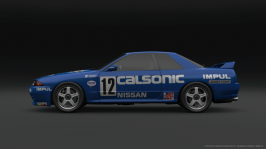
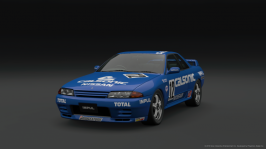
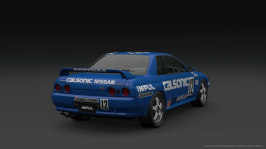
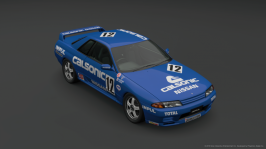
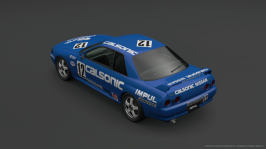
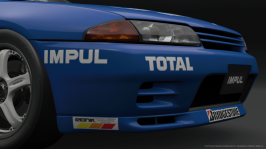
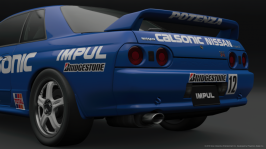
 Nissan Skyline GT-R V・spec II (R32) '94 - Calsonic '93 (2.01)
 - Whilst researching and preparing for my next livery I stumbled across an official vector for the 90's Nissan logo. That meant I could go back and replace the handmade version I'd been using up until now. After studying better reference images I also took the opportunity to re-scale and re-position a number of the other decals for more accuracy.
Download Here
 Nissan Skyline GT-R V・spec II (R32) '94 - Winfield Racing '92 (2.01)
 - Updated with the official Nissan logos.
Download Here
 Nissan Skyline GT-R V・spec II Nür (R34) '02 - Falken '02 (3.00)
 - In my research I'd also found better versions of a number of decals I'd used on my Falken R34. These were too good to ignore so this release sees updates to the C-West, Project Mu, Bride and ATS logos with official vectors (where necessary, modified to suit) replacing my original handmade versions. As before only one decal still alludes me (the small white rectangle with what looks like a blue MasterCard logo and some Japanese text below the Calpis decal) but it is now more accurate than ever!
Download Here
If you've read this far, congrats. I feel as though some sort of intermission is required, drinks and a selection of snacks are available in the lobby and toilets are situated towards the rear of the building (but this is the internet and chances are you're already on the can whilst reading this!).
*The lights flash to signal that the audience should return to their seats*
Nissan Skyline GT-R V・spec (R33) '97 - Nissan Prince Chiba '95 (1.01)
Status:
Uploaded | Availability:
Public | Tags:
"ecr" "princechiba" "r33" | Version(s):
(ver 1.03) | Link:
Download Here

Flashing back a few weeks and I'd just finished submitting my theme to
@syntex123 for the third round of the Livery Editor Competition. Knowing I'd not be eligible to enter my own round I needed a new project to embark on. The BCNR33 had just been added to the game and it had been on my to-do list and now it felt like the right time to give it a crack.

Despite previously owning an ER34, I'm unashamed to say that if asked to choose, that the BCNR33 has to be my favourite Skyline and trying to choose an appropriate livery for your favourite car can be a tricky task. Whilst the BNR32 enjoyed the majority of its fame and success in the road-car based Group A and N categories, the BCNR33's Iconic liveries all seem to stem from the wildly aero'd JGTC and GT2 divisions. Somehow replicating full-fat GT liveries on road-cars always ends up looking a bit naff.

Hot on the tails of my Impul BNR32, my initial plan was for a "What if the Japanese Group A series had continued into the late 90's and featured the BCNR33?" version of the iconic Calsonic livery, I mocked it up in the Livery Editor but it didn't really smack of originality or show any real skill. I knew I had to try harder.

Like the '32 before it and '34 that followed, the '33 enjoyed plenty of success in the popular N1 Endurance series (now the Super Taikyu Series). The early cars wore road bodywork and featured minimal mods, the style lending itself well to road-cars. Wanting to try and be original, my idea (somewhat inspired by my own theme for the LEC) was to create a fictional ECRacing design. I looked at various cars from the time and I got as far a finished state.

The colour scheme was simple, black with fluro' red/pink accents. For sponsorship I chose Q8 oils (it seemed commonplace in 90's JDM Racing to have obscure smaller domestic or 'exotic' overseas oil suppliers) and later added the Akai decals as they seemed appropriate. Once complete something didn't look right, for the time involved it looked too basic and I wasn't proud enough to share the results never mind release it as my 'definitive' BCNR33 livery, I had to go one better.
Technical Point: It's worth noting at this stage that the skin for the R33 is bugged to hell. The skin for the spoiler overlaps the 'Body' (a thin vertical line on the driver's side front wing/fender) and 'Other' (a thin horizontal line on the passenger side B pillar) sections 'cross-contaminating' with the area around the 3rd brake light meaning decals placed in these positions result in artefacts appearing elsewhere. There's also an area behind the rear pillars that doesn't cover 100% with decals meaning masking can look a little rough if the paint is a different colour to the decals. I'd tried a concept with a gold base coat with black masking but 'cracks' appear in the decal layer allowing the gold to show through from certain angles.

If one thing my N1 research showed, it was the popularity of the #32 Nissan Prince Chiba entry. I'd long been aware of this specific team/car, not only as I have a 1/43 scale resin model of the later BNR34 on my shelf, but more so as it provided the basis/inspiration for the Race Modification version of the BCNR33 in Gran Turismo 1 and 2.

I was initially put off attempting a replica by the Japanese text that adorned the sides. If I couldn't get that right then any attempt would look half-baked. Thankfully some careful Kanji/Hiragana matching and lots of copy and paste led me to translating the wording to (the now rather obvious) 'Nissan Prince Chiba', this led to finding their website and better still a PDF containing their logo!

After further studying some rare high-res images I discovered via
www.progcovers.com (I implore you to check it out, lots of high-res scans of historic motorsport programme covers, often showing cars from smaller series not necessarily found elsewhere online) I worked out that if I replicated the '95 car (as per the Sportsland Sugo programme cover) not only could I avoid having to place decals on the dodgy areas of the R33's skin, but that I'd also be able to avoid a selection of decals I'd so far been unable to identify or find in enough detail to copy. So began what turned out to be a mammoth project.

You may look at the finished result and think it looks a bit simple, almost 'too easy' in fact and I wouldn't blame you. But in truth I've lost count of the time spent researching and tracing/making decals. The hours involved just getting everything I needed together before even firing up the game could easily be grouped into days if not weeks. At the very start I listed every decal on the car and one by one I ticked them off, however much like a kid with a plate of vegetables I left the worst till last and by the end I was spending a day alone identifying and replicating what I needed.

Some decals were easy. I (obviously) already had Falken in my collection and the modification to add a thin white stroke to the red cross bar on the F was an easy job. The Nissan Prince Chiba PDF had provided the main sponsor logo and it didn't take much custom work to modify it into the Nissan Prince Sunny-Kita logo required for the rear wing. The number board and driver names were child's play and I was able to source the Häagen Dazs and a usable version of the (not actually period-correct for the 90's but what they used on the real car) 70's Subway logos. I already had the necessary TEIN and RAY'S logos uploaded but that's where the luck ran out.

Aside from discovering a (logo containing) PDF for RESPO (fuel additives) and sufficient 'parts' in various PDF's to create the Suntory Coffee BOSS decal, everything else you see on the car has been done from scratch either from matching fonts, tracing or by eye. A mean feat when you realise that few of the sponsors still exist never mind had a web presence when they did. Despite hours of research I still have no clue as to who/what half these sponsors are.

Even having having half decent reference images can be just the start of it. For example, Auto Land Zoo appears to be an import car dealer but there are numerous companies trading under similar names none of which using this particular branding. In the end I had to manipulate the logo from the (more readily available) high res shots of the BNR32 N1 car (which resides in the Prince & Skyline Museum) and in a CSI-style moment, skew and reshape them in Photoshop to form a good enough version to allow an online SVG tracer to do the rest (I'd normally frown upon auto-traced decals, but the bumpy nature of the text meant it was easier than trying to trace by hand).

In regards to reference material, it was hit and miss. Much like the Winfield BNR32, the car still exists today as part of the Nissan Heritage Collection (albeit in its be-winged post-'97 guise) and whilst the modern high-res shots have proven useful (on the sides for example, aside from the position of the number boards changing, the door panels have remained largely unaltered since '95) finding detailed in-period shots proved much harder. Trying to ascertain the identity and position of the decals on the hind quarters was a balance of working it out from lower quality (think early days of the internet) photos and from pictures of the various die-cast replicas of the car which helped to provide content at the expense of scale and position.
 The Nitty Gritty
All in all I must have compiled, studied and cross-referenced every shot of the car available online and re-positioned each decal at least 2-3 times in order to get to the stage I'm at now, and in terms of accuracy id say it's as good as I can physically get. For now I know I'm definitely missing one decal on the lower sills. This is wholly down to being unable to identify what it is. In all the images I've found of the car, this area changes every time (it's like the team ran a different decal (or message) for each round).

Assuming I stay true to the two main images I've used as a guide from the '95 season, then I've narrowed it down to either a decal for NPC-S Club (as seen on the Gulliver Tomica-based 1/64 scale die-cast model, an earlier version I've found on the team's previous BNR32) or (as per the Sportsland Sugo programme cover) another location of the Nissan Prince dealership chain (but due to the angle of the shot I'm unable to identify the crucial last two Kanji). Aside from that, the 1/64 scale die-cast decal sheet suggests there's another decal missing from the boot lid (possibly a series specific N1 logo) but it's far too small to decipher and there's no other reference available to collaborate it's existence. Either way I've decided to leave them off (if I ever identify them you can rest assured that they'll be added).

It wouldn't be one of my liveries if I hadn't included some little extra details and special techniques to separate it from the crowd and this livery indeed packs a couple of tricks up its sleeves. By default, GT Sport has you colour the full front splitter (including the insides of the brake ducts which looks unrealistic), here I've painstakingly coloured the insides of the ducts dark grey to closer match the real car (I'd have loved to have used matt black but this was not possible).

For accurate shape and position, masking decals were required for the J and Mu on the main Project Mu logos as they ended up stretching and distorting due to the complexed curves of the front wings/fenders no matter what angle you projected them. For the front I had to create a special version of the Häagen Dazs logo that gradually got more squat towards the top to compensate for the stretch as it wraps over the curve of the bumper (I'd initially attempted this by 'cutting' the decal in half using the angle limit but could not get a clean join). After much trial and error I also made a curved version of the Falken decal to match the shape of the front splitter. This proved tricky as I also had to reduce the height to compensate for the angle of the splitter. As the real car ran a slightly different N1 splitter I had to make a judgment call in terms of optimal scale and position.

Splitting the Nissan Prince Chiba decal for the driver's door to have it avoid the panel gap (as per real life) and some clever splitting and scaling on a couple of the other smaller decals helps maintain a realistic appearance as they transition over the more complex shapes of the bodywork.

I afforded myself a small degree of artistic licence for the Sparco and Häagen Dazs logos, placing them slightly higher than on the real car in an effort to avoid the GT emblems not present on the racer, and the inclusion of the Super Taikyu front plate merely makes use of the otherwise redundant space, but every other decal is placed as accurately as I can manage.


 , it's more of a "if you ever have time" kind of request.


 Happens to me all the time.
