You are using an out of date browser. It may not display this or other websites correctly.
You should upgrade or use an alternative browser.
You should upgrade or use an alternative browser.
GT7 SVG request thread.
- Thread starter daan
- 5,705 comments
- 431,758 views
- 17,403

- United Kingdom
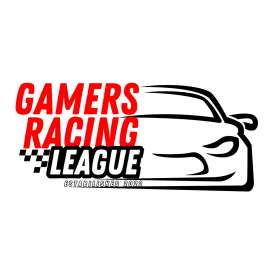
GRL Mini is one decalHello everyone.
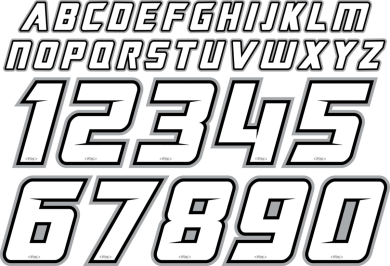
I need a help making a SVG from this two PNG images for GT7.
Thank you very much in advance.
The complete GRL logo I've done as three parts. It could probably be one decal, but the font used is terrible for small file sizes, and this gives you more options.
edit: Check out the number of nodes used for one character in the Zing Rust font, versus Arial...
Attachments
Last edited:
- 1,797

- Singapore
- XSquareStickIt
Can anyone help me figure out why my svg has such a large file size? This is 144kB on its own.
I suspect I'm doing something wrong in Inkscape when I use Object to Path for the text, because the text seems to have a lot of nodes. I grabbed the text in the pink and blue boxes from this pdf file for reference. Maybe that's why?
Is something like this really impossible to get under 15kB?

I suspect I'm doing something wrong in Inkscape when I use Object to Path for the text, because the text seems to have a lot of nodes. I grabbed the text in the pink and blue boxes from this pdf file for reference. Maybe that's why?
Is something like this really impossible to get under 15kB?
Attachments
- 17,403

- United Kingdom
It's a really bloated file in terms of how all the style information is written, and what's included. SVGOMG will strip out a lot of that. I think saving as plain SVG might help too.Can anyone help me figure out why my svg has such a large file size? This is 144kB on its own.
I suspect I'm doing something wrong in Inkscape when I use Object to Path for the text, because the text seems to have a lot of nodes. I grabbed the text in the pink and blue boxes from this pdf file for reference. Maybe that's why?
Is something like this really impossible to get under 15kB?
What do I mean by bloat.. open the file in notepad and look for repeated things, anything related to font, anything that talks about sodipodi, unneeded id's, labels and groupings, decimal precision is 5 decimal places... mostly it shouldn't be there. I also see there's some matrix transforms in there, which probably won't work when you upload to GT anyway.
Even then, the characters used in Asian writing are often node hungry (in the same way a serif font is compared to a sans-serif font), so a lot of characters means a lot of nodes, and that's just going to eat up the file size. If you look at this from my post above...
You'll see that characters turned into paths use the fonts original nodes to draw an outline of the character, so if the original font has loads of nodes (like the G on the left), the path will too. If I was doing this and trying to get it as one decal, I'd redraw all the characters using a single line, and give it a line thickness (rather than using the outline of the letters) - it's time consuming but it dramatically cuts down on the number of nodes.
Some of the text you've copied is also a brush style font...
View attachment 1388772
Waaaaayyyyyy too many nodes. You'd need to either delete loads of these, or just redraw it.
If you did it from scratch 15kb might be achievable, but for the time it would take I'd probably just accept it was going to be two decals. That said, scrutineering stickers often are so small and complex they just become a mush of pixels, so not worth spending that much time on either way.
Just my two cents.
- 3,732

- United Kingdom
- SlenderMan_FSR
Can anyone help me with this decal?

- 17,403

- United Kingdom
Attachments
- 1,797

- Singapore
- XSquareStickIt
You sir are a benevolent wizard! Thank you for spending a whole hour on a total stranger!
I'll share the livery with you the moment it's done!
- 17,403

- United Kingdom
Attachments
- 3,732

- United Kingdom
- SlenderMan_FSR
Thank you 

- 43

- Spain
- GrouchyOldRacer
- 17,403

- United Kingdom
Hello all,
Could someone help me with this so I can get this logo as a decal on GT7?
Thank you!
Attachments
- 43

- Spain
- GrouchyOldRacer
Awesome, thank you!
- 17,403

- United Kingdom
Could I get these numbers without the gray outline
Attachments
- 3,732

- United Kingdom
- SlenderMan_FSR
Back again in need of help with this decal please?


- 854

- Germany
Back again in need of help with this decal please?


Attachments
- 3,732

- United Kingdom
- SlenderMan_FSR
- 854

- Germany
My bad. Left the reference image in the file. Try this one

Attachments
- 3,732

- United Kingdom
- SlenderMan_FSR
My bad. Left the reference image in the file. Try this one
 all sorted Thanks again
- 43

- Spain
- GrouchyOldRacer
I really appreciate you helping with that, but it isn't very clear on GT7, it is actually quite blurry.
In the past I've had quite complicated logos done, which have come out very clear, and this logo in comparison is quite simple.
I'm no specialist with this, so I do appreciate the help we get on this forum, but the logo that was converted just doesn't look right on the car.
Any chance it can be redone, please?
Or, the block one as well?
Attachments
- 17,403

- United Kingdom
This isn't because of the file. It's a vector, it almost literally cannot be blurry (in terms of tags that will work in GT7 at least).but it isn't very clear on GT7, it is actually quite blurry.
In game decals appear with different resolutions depending on which car, and what part, they're placed on. For instance, often I've noticed of you're putting it on the 'other' section of the car, it will appear lower resolution, they're also appear to be less crisp on the edges if used on a special paint surface... but that's not the SVG. They will also vary depending on the projection angle type used.
Open the file I uploaded in a browser and zoom in to max, it'll be perfect... 'cos that's how vectors work. Put one one you think is quite clear on the same spot, on the same car, the same way, and it won't be perfect.
Sorry, that's just how it is.
Last edited:
- 43

- Spain
- GrouchyOldRacer
No worries, thank you for explanation. As I wrote, I'm no specialist in this.This isn't because of the file. It's a vector, it almost literally cannot be blurry (in terms of tags that will work in GT7 at least).
In game decals appear with different resolutions depending on which car, and what part, they're placed on. For instance, often I've noticed of you're putting it on the 'other' section of the car, it will appear lower resolution, they're also appear to be less crisp on the edges if used on a special paint surface... but that's not the SVG. They will also vary depending on the projection angle type used.
Open the file I uploaded in a browser and zoom in to max, it'll be perfect... 'cos that's how vectors work. Put one one you think is quite clear on the same spot, on the same car, the same way, and it won't be perfect.
Sorry, that's just how it is.
I was thinking it was because the image was too small? If I had a higher res version, would that make it crisp on any surface?
- 854

- Germany
No, as svg's have no resolution. It's a vector path that renders in the resolution of the screen it is viewed on or baked (rasterized with a set or fixed resolution) into an image for use by the target texture/shader, like in GT7.No worries, thank you for explanation. As I wrote, I'm no specialist in this.
I was thinking it was because the image was too small? If I had a higher res version, would that make it crisp on any surface?
There is a little bit of wiggle room to max out the baked decal resolution in GT7 (if you search for identical decals in the Showcase, some are smaller than others). But as far as I can tell, the svg provided by Matsi already uses the full resolution the GT7 decal uploader offers.
Hello everyone!The data size of a SVG file depends on how the image is created, even if the end results may look identical. If an SVG file size is too large and the image cannot be uploaded, you can reduce its size by editing the anchor points and path data of the SVG image. Specialised optimisation software for SVG files can also be effective in these instances. If you use Illustrator you could try to click Object > Path > Simplify. If that doesn't work to well, try this online optimizer to get the size down!
I'm sure by now you all have heard you can import your own user decals to use within the game!
For all you guys and gals out there with little understanding of how to do this, I've decided to make a tutorial thread on how to make those logos ready for upload!
The image type you need in order to use it within Gran Turismo Sport is .SVG. This is short for Scalable Vector Graphics.
This is basically an image that doesn't get any loss in quality no matter how big or small the logo is! Isn't this great?
First, let's start with the basics.

What are the differences between Raster (for example BMP, Bitmap data) and Vector(SVG)?
The BMP format generates an image using groups of dots. If this type of data is enlarged, the small dots will start to be stretched, making edges of curves jagged or blurred.
On the other hand, the SVG format converts images to numbers when storing them. The advantage of vector data is that even if an image is enlarged, the image quality will not deteriorate, and the data size will not increase either.
The diagram below shows a comparison of an enlarged BMP file (left) and a SVG file (right). On the SVG file, the sharpness of the edges is maintained.
View attachment 690257 View attachment 690256
But remember guys and girls! We have a size limit of 15KB!
Let’s take a look at a comparison of two SVG files generating the same image.
View attachment 690258 View attachment 690259
On the left there's an SVG file that was generated automatically using a non-structured Bitmap image (a collection of dots) as a base, using the auto trace feature of an editing software: unnecessary anchor points can be clearly seen, and they are not accurate either. As a consequence, the file size becomes large.
On the right there's an industry standard SVG file created by manually editing vector data of a Bézier curve: it consists of the least number of anchor points, and each applied with high accuracy. Because of this, its file size is also small.
Now you've got the basics, let's begin with the tutorials!
I want to start off with a video tutorial, much like the Affinity Tutorial(since it is Affinity Designer I'm using), but here you can see more to it! If you use Illustrator or any similar program, it shouldn't be too different to this. Also, if you're unsure how to upload the decals once you make them, keep watching until the end! Here you can see the entire process.
TUTORIAL #1: ILLUSTRATOR
What you want to do is to download an application an application that handles .svg files. For the first tutorial I'm going to show you a real easy way using Adobe Illustrator CC. This application can be downloaded for free for Windows and Mac OS, and has a 7-day trial.
This method works great if your logo is simple, because like we've just covered, this will create unnecessary many anchor points, and bring size up. Most single and two-colored logos should work fine this way though, so don’t be afraid.
Okay let's begin! Find a decent logo that has some size to it already if you're able to. For this tutorial I've chosen to use a Speedhunters logo.
View attachment 690260
This logo is 900x900, not particularly big, but it isn't too bad in terms of quality, so it should work fine.
Open up the image in Illustrator.
View attachment 679418
Then click Window > Image Trace. This will open up the bar you see on the right side on the image above.
View attachment 679419
Play around with the settings you see here, until you're happy. Choose ignore white if you want the white to be transparent. This is especially important if you're working on a logo that is any other color than white, or else it will make a white box around the logo, and inside letter like O, A etc..
Edit the mode if you plan on choosing a multi-color logo, and set total amount of different colors. The fewer colors the better.
And you're done! This method should work for most images you find. All that is left is to export the image, don't forget to choose SVG!
View attachment 679422View attachment 679421
The finished result can be seen or downloaded here.
Enjoy making decals for Gran Turismo Sport!
Good sites to find pre-made vector logos:
WorldVectorLogo
Brands of the World
Logopedia
Instant Logo Search
Wiki Commons
However, the logo could also be split up into multiple pieces and assembled back together on the car.
Last edited:
- 17,403

- United Kingdom
Nope, I redrew the logo from a blank screen, so the resolution of the image you first posted doesn't matter. You can use a site like https://cloudconvert.com/svg-to-png to turn the SVG I made into a much higher resolution PNG file, like this...I was thinking it was because the image was too small? If I had a higher res version, would that make it crisp on any surface?
But it doesn't matter what you then do with it, you won't get a better SVG from it, and it will still only appear at whatever resolution PD convert it to when its used in the game.
- 43

- Spain
- GrouchyOldRacer
Okay, thank you, and I'm sorry for bothering you again with this.Nope, I redrew the logo from a blank screen, so the resolution of the image you first posted doesn't matter. You can use a site like https://cloudconvert.com/svg-to-png to turn the SVG I made into a much higher resolution PNG file, like this...
View attachment 1390357
But it doesn't matter what you then do with it, you won't get a better SVG from it, and it will still only appear at whatever resolution PD convert it to when its used in the game.
Thanks for explaining, makes sense.
Last edited:
- 43

- Spain
- GrouchyOldRacer
Thank you for your comment.No, as svg's have no resolution. It's a vector path that renders in the resolution of the screen it is viewed on or baked (rasterized with a set or fixed resolution) into an image for use by the target texture/shader, like in GT7.
There is a little bit of wiggle room to max out the baked decal resolution in GT7 (if you search for identical decals in the Showcase, some are smaller than others). But as far as I can tell, the svg provided by Matsi already uses the full resolution the GT7 decal uploader offers.
However, the logo could also be split up into multiple pieces and assembled back together on the car.
As I wrote, I'm no specialist at this, so was just curious.
Thanks for your input, it's appreciated.
Similar threads
- Replies
- 7
- Views
- 3K
- Replies
- 2
- Views
- 995
- Replies
- 5
- Views
- 512
- Replies
- 7
- Views
- 3K
- Replies
- 7
- Views
- 8K


