Hayden's Cars- Annual update!

  • Thread starter Hayden
  • 428 comments
  • 79,020 views

What should I do?

  • Keep the 300zx, don't spend any more money

    Votes: 0 0.0%
  • Keep the 300zx, make it awesome!

    Votes: 6 54.5%
  • Sell it and buy a 350Z

    Votes: 2 18.2%
  • Sell it and buy an S2000

    Votes: 3 27.3%

  • Total voters
    11
  • Poll closed .
@Punknoodle Car was definitely a bit of a handful and tended to understeer a bit. It also had major issues with bottoming out, particularly through the sector around 4.25 in the video. There was times where the car physically hit the ground that hard that it seemingly jumped a foot closer to the barriers.

Currently it’s suspension tune is a mix of a bit of stuff we learnt from drifiting, some ideas we’ve found through research and a “that looks about right” measuring system. It does have a tendency to push and on transition snap oversteer. There’s no question that if setup was handled by a knowledgeable professional that we could make the car much more neutral in handling and undoubtedly faster.

The main thing we want sorted for now though, is the bottoming out. We’re on the path of buying larger wheels, both diameter and width wise, to stop the scrapes and allow for much wider tyres. Once that’s sorted we’ll take It to a Motorsport focused wheel aligned than go out to Mallala for a day to test and tune the final tweaks.

I reckon I seen that GT4 there. They’re definitely a very capable car and the WRC version that showed up was sinply awesome. If you wanted to come down for an event like this, I can’t recommend Legends highly enough. If you could take a week or two off work and time it so you could be at a track day at Tailem Bend the weekend before or after as well, it would more than make it a worthwhile trip 👍
26A3EEDF-04A2-4249-8D2D-57665FEF4D58.jpeg

So i’ve got the ‘Vert back from the dyno shop with a relatively clean bill of health. Compression is ranging from 130-150, which while less than perfect, will be fine for a good few years yet. The car has a few small coolant leaks under the plenum which i’ll address once I have a garage and the injector connectors are all old and brittle, which occasionally causes them to work loose and the car to misfire.

Importantly, none of these problems are major or immediate, and with the parts already sat aside for the injector connectors, I’ll have the car up and useable ready for a cruise tomorrow night.

All in it made 160RWKW on 1 year old fuel, with all standard parts, standard tune, running 5 pound of boost and an NA’s exhaust. Which, while nowhere near the numbers I’m used to talking about with the Chrysler, is enough to make it a bit more entertaining than the 86.

890EB645-191B-4175-B907-9F6435AB68D0.jpeg
With the good news from the dyno shop, I took the Zed around to the people who supplied the Chrysler’s Nangkangs and had a similar set of NS2R’s installed on my LMGT4 wheels. The guy and I were both curious, so he weighed one of my 9.5 inch rear wheels on a digital scale and without a tyre it came in at just 8.2kg. Very, very light for a wheel of its size!

Thanks for reading and merry Christmas! :cheers:
 
Hey... new page! :D
So the cruise went flawlessly and the Zed performed without drama the whole weekend. My mom brought up the SRT8 Jeep and my dad came with his ‘66 VC Valiant Ute. The sheer scale of this event is very, very hard to grasp. “Jaf’s Last Cruise” as they call it, is in it’s second decade of running and this year brought apprx 3000 cars together for a 50km cruise with a mega meet at each end. The journey took about 3 hours, with gridlock most of the way and thousands lining the streets to see the parade of precious metal.
FE00E266-54A8-4174-ABC0-DAC24EDC7049.jpeg
It’s South Australia’s biggest car event and brings in people and cars from absolutely every tiny sub culture of car enthusiast. A hot rod, next to a drift car, next to a Ferrari with all manor of JDM, Australian, Euro, muscle and just plain interesting cars surrounding them is a sight to behold.
D89A3B99-358B-401F-802F-13CC602C284A.jpeg
I unfortunately didn’t take many photos of our cars, and it bit me because neither did anybody else. Well with the exception of dad’s ute. That car is apparently a total camera magnet.
47ACB720-5530-4BFB-A186-3D8B63F89125.png
Which dad really enjoyed rubbing in my face. Oh and did I mention he came back to a note on his windscreen from someone wanting to buy it? Yep, looking forward to hearing about that for the rest of my life :lol:
To be fair, his Ute is pretty cool. A VC model with the earlier and much preferred AP front that was never available in the Ute. One of his trademark backyard resprays, Standard 225 slant 6 engine (with a turbo manifold under construction), 4 on the floor, 300c electric seats (guess where they came from) and a very rare aluminium canopy. Still stings a bit that I couldn’t find a single photo of the Vert post event but I found about 5 of his Ute :lol:
7EB8ACF8-5F36-4FE3-B5B2-FDCDDB696E5C.jpeg

But regardless we all had a great time and I’ve set my sights on the next event for my car. Thanks to the organisers and a big thank you to the photographers. Cheers for reading :cheers:
ED5E0F5B-A8C0-4D29-A091-133D5449745B.jpeg
S3yxlaomYPPysY7BvNiJZxrT11RRryrYoKf9peqNgwbelUWk3iwwHnAQoFv2tdLWBtU1hEvCm9LLNg6wdoDzjbrGqbqjdwGcuWw4kbjzAf_Wtevp8IH5b9e5iVVgik_-BxLgwK4tLnGcOv2EMbSMcmuvQQAty2e0cmUauR6cffq3C7hvyhMb068SsMccv28cgB4_LWsOHBF0YSvtRSrrgvtQ5I63EE8BPJKtfiK0V2ghbgLzCvSHIDxdL7dBq0AZIjwGaB6wzc6T1yGyWro4ZmSVfxyQdvtW3pVyNyVB8k2x_NCorUZmDX9Vu0ZmifT2-TunHYD8qnGVn6awqzHP0yQZCcys2P0fFs9ivk6ZZ0qVK7nV9kPFxjI9Dadam0HP0PWgMQEbGCU0bXLkkgcwarzk-LVgjzeh4WlO_-wObnJMQ7KBTlLmag4Vj6luKK_WULHh3COgelIg-KQ9UyJMrKzxMTYWrGFIM48I9Qxb_28Uu4QFtITvkDhsUkvsgtirzIn4VT6uwQYmzTU5emvE-Kx3nH9Ex5wDuUORRtgeMdOYsAUc7RPy7Dz84zEsMGWY7aGnyTQ4RgwWlEzOYoRrne1CN6AfZqsceJrDGcM=w956-h637-no

2CCBC1C5-46C9-47BD-B19C-9B29E3F1ADE0.jpeg
71C7A668-605C-4ED1-A459-D82A7269BB40.jpeg
3C293B30-6AA9-423E-B9EF-3C61B17EB4C7.jpeg
233B15C5-E2DD-43D8-B5B6-E3083E511C69.jpeg
D5305DFD-8AC7-4629-B26C-762D900FEBB4.jpeg
53B43C69-29A5-4EA3-B13B-17B62087253C.jpeg
6077E466-82F4-4EE3-888C-62DBE15CE8CB.jpeg
CC90A0F0-4514-416F-9874-D1EF871C6300.jpeg
CDADEEBE-F5C7-4D14-9C65-A77BA813BB99.jpeg
4A9EA7D3-44D9-472F-8D0D-30B02863C1EC.jpeg
 
Last edited:
Tell your dad his ute is awesome. And his beard too :cool: That event looked super nice and I am envious of your summer.

I love the Vert. But is the 300C on Nankangs?
 
I’ll pass on the message :lol:

Both cars are running Nangkang NS2R semi slicks with 180 treadwear rating. We heard a lot about them from our time drifting, with the top tier guys loving them for their affordability, accessibility, durability and grip. The Chrysler runs 18” with 235 front and 245 rears. The 300zx is 17” with 235 front and 255 rears. I could’ve went a fair bit wider on the rear of the Zed but considering it has half the power of the 300c, I didn’t see it as necessary. I’d also heard they like having similar sixes front to back so didn’t want to upset the car’s balance too much or foul on suspension by making the fronts wider.

The key for us is definitely the price. For reference, the full set of NS2Rs on my Zed cost about the same as a single ADVAN A050 semi slick, or about 1/2 the price of a set of RE003 road tyres. While the NS2R will unfortunately no longer be an option when we get the required bigger wheels for the Chrysler, because their size range is quite limited, the low price and high grip make them perfect for the Zed and it’s intended uses. 👍
 
I have an event lined up for the Zed tomorrow. Slowcase, hosted by one of South Australia’s largest car culture groups, is essentially a car show for Adelaide’s nicest modified cars. To my amazement my entry was accepted, and knowing the high standard of the rest of the field, I decided it was time to give the car some attention. I spent the last few nights after work doing some odd jobs on the car. I don’t have any after photos of this work, but I’ll make sure to get plenty at the event so you can see the change.

The first thing I did was a job straight out of the 90’s, by running a pin stripe down the length of the car... no I’m not kidding. Out of the factory the ZXs have a body line that runs around the bottom, set off with a black pin stripe. In the nearly 30 years since they started building them, most Zeds have lost their stripes due to sun fade, crash repairs and aftermarket body kits. The only part of my car that still had a remnant of the pinstripe was the side, with this dull gray line running the length...
6DA8E0E6-3C01-4BE9-BCD8-ADD9FEA21E74.jpeg
I used 9mm black pinstripe to fill the line from front to back. May the ‘90s never die :gtpflag:

The rear end of the car has always looked a little bit unfinished to me, as I never got around to reinstalling the rear mudflaps or getting the black strip that runs between the spoiler and tail lights; along with the “Nissan Fairlady Z” & “Twin Turbo” stickers that fit In that space.
F888BF91-CC1D-4060-9A0D-275C8E527D99.jpeg
A local Z club member works for Nissan and was able to order all 3 genuine stickers for me at below trade price. The mud flaps was an easy job, I replaced an exhaust hanger while I was at it and with some care I was able to get the stickers on without many noticeable air bubbles. I decided against putting the TT sticker on, as I don’t want to attract the wrong kind of attention with this car. Part of me thinks it looks unbalanced without it though. :irked:

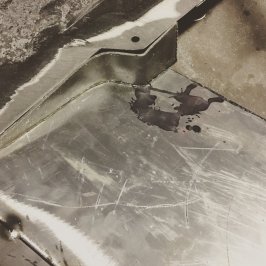
Next I had a look at this very ugly petrol spill stain that has been on the car since I bought it.
723127FB-5C0F-4965-A760-A1EEB430EFD8.jpeg
I wrote it off years ago as permanent clear coat damage, but some research led me to believe that a good scratch remover may tidy it up a little. It took a lot of elbow grease and it’s still not perfect but I managed to get the stain to be a bit less noticeable.

My LMGT4s were next to receive a highlight, particularly their trademark Nismo stickers that have unfortunately seen better days. A heat gun and some very careful use of a Stanley knife got them off without damaging the silver paint on the wheels.
17D38547-6D6D-4007-BCBB-57B7835DE737.jpeg
As much as I wanted to hate the look of the wheels naked, I actually quite liked it. A clean and simple look that I actually considered keeping around for a while.
2FFE43F2-8409-4C2E-AB79-ACCF027EE8FC.jpeg
Running without stickers however isn’t an option because... :lol:
62513ECE-93C1-476B-938A-7AD6D9493F3B.jpeg
Unfortunately my $4 eBay spec replica stickers came in silver rather than black, making them basically invisible on my silver wheels. So I carefully peeled the transfer paper off the top of the stickers, sprayed them with black paint and left them to dry. With any luck, I’ll be able to use masking tape to transfer the stickers onto the wheels where their natural stickiness will keep them attached.
CE652CF4-2160-4A4D-A54E-64C008066706.jpeg
I’ve always felt like the car doesn’t run quite right. Last night, suspecting a misfire, I tested the wires running to each coil pack and quickly confirmed that despite the broken clips, they were working ok. So the next logical thing to check was the coils themselves. With the car running and my ear up close, 5 coils made a noticeable click-click-click noise, 1 did not. I pulled the silent coil while the car was still running (I’m no mechanic but this probably isn’t best practice) and there was no noticeable change in the engine note. I then put that one back in place and pulled a different coil pack. Not only did the car run noticeably rougher but the coil produced blue sparks (which caught me off guard and scared the hell out of me) so I hastingly put it back in. I can sense mechanically inclined GTP members cringing from here.

With my backyarder brain saying I’d found the issue, I asked the local Z club if anybody had a spare coilpack and a guy was very quick to offer me one for free. With a wrecker quoted $75 part, and the $10 the kind guy had refused to accept in my pocket, I went back to the car. I plugged in the new coil and immideatly the car ran better, idled nicer and behaved far more smoothly than ever before. I don’t know how long the coil’s been broken, why none of the 5 mechanics this car has been through since the swap have picked it, or what effect it would’ve had on the dyno; but it’s very satisfying to finally have it sounding and feeling “right.”

Also under the bonnet i fitted a battery restraint, tidied up some loose wires and gave it a very thorough cleaning. There was still dirt in there from the swap (3 years ago) so it was nice to finally make it clean.

After that, everything else also got a clean. The car got a wash top to bottom, a clay bar, polish and wax. Door jams, the inside of the boot and decklid were all cleaned and the inside also got a thorough once over. This took hours but the result was well worth it.... But you’ll have to take my word for that because I didn’t take any photos :lol:
 
Last edited:
I pulled the silent coil while the car was still running (I’m no mechanic but this probably isn’t best practice) and there was no noticeable change in the engine note. I then put that one back in place and pulled a different coil pack. Not only did the car run noticeably rougher but the coil produced blue sparks (which caught me off guard and scared the hell out of me) so I hastingly put it back in. I can sense mechanically inclined GTP members cringing from here.

As a qualified mechanic, I can say this is probably one of the best, simplest and easiest ways to test if a coil is down. In fact, I did pretty much the same thing on a car the other day to see which injectors were/weren't working. So, no cringing from me. ;)
 
As a qualified mechanic, I can say this is probably one of the best, simplest and easiest ways to test if a coil is down. In fact, I did pretty much the same thing on a car the other day to see which injectors were/weren't working. So, no cringing from me. ;)
Yep I probably would have done the same thing. You can also check the plugs. A cylinder that isn't firing but is still getting fuel will wet the plugs. You can also use a thermal heat gun on the exhaust headers etc.
 
And here I was thinking I’d been a bit of a dodgy buggger :lol: Cheers for clearing that up for me guys 👍

So, here’s the result of about 5 hours of detailing. A good hand wash & clay bar, followed by a scratch and swirl remover & polishing compound applied through a machine, then finished with a hand wax. It’s easily the cleanest the car’s ever been and I’ve gotta say, I’m pretty impressed with the paint after 25 years!
579A4D31-A524-4DFF-BC73-AD5293FB703F.jpeg


The Slowcase event went off without a hitch and the Zed actually didn’t look too out of place in the sea of modified cars.
3F5DB3F1-8E70-40B3-B524-9C1194C22CC5.jpeg

I had a lot of people come up to me to talk about the car. Most were amazed to see a Covertible ZX, with a vast majority of people unaware that Nissan ever made one.
FBAD902A-87F0-40D3-8BEE-6ECDDCABD71F.jpeg

With my attempts to paint my Nismo stickers being a failure (and thus left off), and no twin turbo decal on the back, there weren’t many hints for people that this car was anything more than a grandpa spec NA... Which honestly adds to the fun a bit. Overhearing people saying things like “is that a side mount” or “this things got a boost gauge” will probably never get old :lol:
FFFF867E-4DA9-46DA-A00A-B101A3CF8E42.jpeg

The event was good fun and there was a pretty nice variety of cars on display. I bought a new long range camera lens a while back for Motorsport photgraphy, but hadn’t got to use it yet, so I put it on to grab a couple unnecessarily long shots of other peoples cars.
DB906ECF-DA9B-4754-8589-3210647068EC.jpeg

E47086A0-8207-42A7-8E12-6F207E1EFFCE.jpeg

EDE732D5-57F7-4595-B523-DC1E472AE77C.jpeg

F119AAD8-644E-4DCB-A37D-A648A93CE11B.jpeg

It feels strange to say it, but that’s about all I really have to say. There’s not a lot to talk about when your car actually works :lol:
BC74CC6B-7052-41D9-92DD-F9D6190899E9.jpeg

Thanks for reading :gtpflag:
CABFA76B-3025-4F7E-B2B1-626119DE9DD0.jpeg
F5DF9853-4177-40CA-9D6D-683ABD292770.jpeg
736FF468-A992-48B7-9611-337A1FA7F277.jpeg
CE25C70D-9E17-443E-9FEF-D268E29AD259.jpeg
2AFFF500-3CBE-40F3-85B4-7A2B6CCB3372.jpeg
53E7AB64-E90B-4E65-83EB-1FDED2506A08.jpeg
46A40A39-65B4-4731-8EFB-6F61802C6604.jpeg
191CC64C-64C1-4647-934B-41F0BC57F2CF.jpeg
331711FC-63DC-4403-9040-7011D90AB52E.jpeg
95A66E8F-C21B-45A0-826E-CA89043DAC26.jpeg
19EF0C5B-28BB-4C19-9482-0429CD2CA11D.jpeg
141D0EAF-F9B7-4D99-A5AA-881E0ACF9874.jpeg
 
In shocking news, without the Ute there to upstage it, people other than me took photos of the Z :eek: :D :lol:
513C47BF-40D4-4F78-8F8C-E7B4E9FD5858.jpeg

910F6C70-BF63-4B87-8255-E0611A4EBE65.jpeg

And one great shot where it’s visible on the right. It’s always very cool to see fully edited, professional photos of your car and a massive thanks goes out to the photographers (T16035 Photography, Through The Lens Photography & Full Boost Photography) for capturing these brilliant images :cheers:
B83E4CE8-DCD9-453B-AF65-BA2CF81820ED.jpeg

EDIT: The Zed also got a mention and a photo on Skibeemo automotive lifestyle blog.

On now to some very exciting Chrysler news! With a track day lined up at Mallala for this weekend, we’ve given it a few driveline upgrades.
First off was this Fidanza light weight flywheel. As anyone that played Gran Turismo 4 would know, a light flywheel improves engine response by reducing rotational mass. This peice is at least a couple KG lighter than the old unit, so I’m very keen to feel the difference for myself. While we had the gearbox off, we also put in a new slave cylinder and a much tougher clutch.
6B8CB833-1A48-4622-88E1-8023CEAD425C.jpeg

While browsing gumtree, dad stumbled across someone wrecking out a ‘16 Chrysler 300 SRT8 and after a bit of research, I contacted the seller about the diff. The late model SRT8 uses a getrag LSD unit which is highly praised in reviews for its traction and drift-ability. After tough negotiation we got the diff, along with the entire rear subframe for about a third the cost of getting just the differential out of the states. With a lot of the bushes and linkages in our car pretty well worn from its 12 years of hard living, getting the entire unit was definitely worthwhile.
0702AE1B-5A8D-46E3-9906-4823C9892D72.jpeg
Even better is that this new kit has only done 15000kms and (apart from the tail shaft) it all pretty much bolted straight up!
391345B7-7A67-4BEF-9810-CBE41AC15F8B.png

As it turns out the guy had bought the 300 as a wreck and is putting the engine and transmission into his Chrysler by Chrysler. His car is beautiful and I wished him the very best of luck with the project. It’s always cool to see builds like this in the early stages
26A54805-B650-4CDD-B5A0-13D9AA93FC7D.jpeg

We’re just waiting on our tail shaft and then all roads lead to Mallala :D :gtpflag:
 
Last edited:
Mallala didn’t happen unfortunately. It was 40*C+ and with the limiter still set at 5k, we decided to give that track day a miss. Our next outing will likely be early April, with a very exciting event on the 27th that we need to do some testing for. SA Time Attack is being hosted at the brand spanking new (not even open yet) “The Bend Motorsport Park.”

240DB024-C115-42BE-BCC0-D73CFDD7A591.png


As you guys know I’ve been doing aero research and designing a Time Attack body kit for the 300c for a while now (Over a year now in fact.) I’ve attempted a DIY splitter with fibreglass and plywood previously, but I took a look at it the other day, shrugged my shoulders and decided to start from scratch using something else.

I started by researching the regs of the SA time attack, and after finding it shares its classes with the World Time Attack Challenge, went to their rule book. Due to our lexan windows, Open is the lowest class of Time Attack we can enter the Chrysler in. The following diagram then became my bible.
14977ECC-CB59-4874-9248-D2D7F02CE11C.png

58CCA7DC-FEC7-45BF-9DD3-26B922B373EA.jpeg

I wanted to get every mm out of the regulations, because every bit of surface area adds downforce. You’ll notice the diagram mentions a maximum width, which is outlined in (g) here...
6FDE426F-C2BF-4502-8BE6-2F1D11FA422C.jpeg

Measuring car width can be difficult, especially when said car is 300km away, so i googled the car’s specs and got it’s max width without mirrors from there.

Then I took what was left of my ply splitter and traced it onto 2.5mm thick aluminium plate. I also measured back 15cm from the front, allowing me to get the side pods to be as far forward as legal. A dual blade saw took care of the bulk of the cutting and I came along after with an angle grinder to tidy it up and do the curves. Next it was a matter of making the centre portion into my maximum allowed width before using the forklift at work to bend the edges into side plates. It sounds pretty ghetto, but it did a pretty great job if i do say so myself ;)
27F75005-E779-4914-8953-873EB5201669.jpeg
D806F110-7149-44A6-AB27-E994C8E3D89C.jpeg

After that I made small plates to act as tire blockers for each side and attached them using rivet nuts.
Then the whole thing copped a coat of gloss black, because Matte Black was $3 more per can :lol:
3870CC81-18C2-438E-A397-A859097C1418.jpeg
7AE8F2DC-14ED-4026-9E8E-7429F7FEE8A5.jpeg

(Far) below average paint job applied, I sent the splitter down to Dad so he could try and fit it. The phonecall when he received it went something like this.

If we wanted to put a snowplow on something, it would be the Ram. This thing looks stupid”
-I know it looks stupid but they work, I’ve done the research and it will give us more grip
“I don’t care, it looks ridiculous”
-Have you seen a Time Attack car before?
“........”
-Have you?
“It’s too wide, it won’t fit on the trailer”
It’ll scrape the front regardless so if we’re taking it off and putting it on anyway we might as well get the most we can out of the regs
“I’m going to cut the edges off so it’s in line with the wheel arch”
Why? We still won’t be able to get it to fit on the trailer?
“I know, but maybe it won’t look so much like a snowplow. You were getting a shop to bend the edges weren’t you? How’d they do it?”
I ended up doing that with the forklift...
“Ah, can’t be that hard then, I’ll fix it up!”

You’d think I’d be pretty annoyed after spending hours building something just for the old man to attack it with an angle grinder, but I find the whole thing way to funny to really care about it. It’s something that comes with a shared project and our different perspectives helps to keep things exciting and fresh. We will be losing some downforce by chopping off the edges, but if it means he hates it less and it makes the splitter legal for a few more events than it was worth doing.
4EB9898F-E44E-4DFC-A6C5-9436EB7E829C.jpeg
If I’m honest, I even kinda agree with him to a point. Time Attack cars do look a bit like snow plows in a way :lol:
EF42E4AA-4990-4C20-8A26-B0041278CA27.jpeg
 
Last edited:
As it turns out, dad ended up doing quite a lot of modificatition to the splitter. In his words it ended up being “by far the worst job I’ve had to do on this stupid car to date.” He used the left over alluminium plate to build custom mounts which he welded very solidly to the chassis. These bolt onto solid tabs on the splitter to withstand the hundreds of KGs of downforce this part will theoretically create.
055C3FF1-A509-4BEB-A037-BA4C6194E423.jpeg

As promised he also trimmed the edges off to be level with the wheels and recreated my side plates and tyre spats. He also joined his centre mounts on the splitter with a vertical peice of plate for extra reinforcement and to direct air to the lower grille. The bumper copped a pretty rough hit from an angle grinder to make it all fit, but we plan on tidying it up before the event. I’ve gotta give the old man props on this one, it looks pretty freaking tough! :cool:
33AFADDB-1258-409A-A9FF-5C99D3D9F9CC.jpeg

D098AF55-1ABD-4E6D-B583-7F7CB13D56D9.jpeg

Next up is the rear wing, which I have designed from scratch to make the most of our regulations. It is literally as large, as high and as far back as possible; utilising the most efficient airfoil I can find. It utilises two 2.3 meter long blades, one with a 30cm chord and the other 15cm. By being 70cm longer than a V8 Supercar’s wing and utilising a flap, I calculate this piece to create approximately 1 tonne of downforce at 250kph. That’s more than twice as much as a Supercar’s wing :D
B6D61C58-264B-4516-8259-D11A483B8730.jpeg
These blades are both currently being cut from foam at a local shop and are apparently the largest he’s ever done. I actually had to ask the time Attack scrutineers for clarification on the regs because I wasn’t sure I’d get away with such a massive piece of aero. They gave it the all clear, so I’m interested to see just how ridiculous it looks on the car :lol:

It will be mounted by the end plates, which I’m currently having custom cut to my design from 8mm aluminium plate that dad will weld in the middle. A lot of testing and work has gone into the design process, so I’m very excited to finally piece it all together in the coming weeks :gtpflag:
913E3EB4-D40F-4120-B93E-E185F0B890E9.jpeg
 
Exciting times in wing world! The foam has been cut and to my absolute amazement, both blades cut precisely to my desired Selig S1223 airfoil only costed me $50. Insanely cheap! :D
A0E96608-DA52-4EE8-B3C7-B2BD5E80F553.jpeg
Unfortunately I had to get the foam shop to cut it in half so it’d fit on the back of the Ute. With my planned aluminium tubing it will be very, very easy to get it back in one piece.
42E1AC3C-A9DA-42BC-89A5-0FE34435118B.jpeg
Seeing the sheer scale of this thing is really spinning me out. It may be one of the biggest wings at an event known specifically for its massive wings. Just look at how it dwarves this eBay spec wing :lol:
7BC038D0-2F71-4D9B-B594-57AD367E0A75.jpeg

Wish me luck for fibreglassing :)
 
Well the 300C has got considerably sillier since the last time I visited this thread :lol:
I’m going to choose to take that as a compliment :lol:

In all seriousness we have gone straight to the extreme with this stuff, and I know it’s overkill. The time attack format and rules really sparked something in me I guess. Being thrown into the second to top class due to something as minor as plastic windows- when, let’s be honest- that’s not going to make a lick of difference on a car that weighs 2 tonnes; was just the license I needed to get carried away with it all. I know the car won’t be winning the class. In all likelihood it will probably be coming in last, regardless of what we do to it. The caliber of cars and drivers in the open class leaves the shed built land yacht and B grade Gran Turismo driver completely in the dust.

I decided to put it all aside and look into the aero to make the most of a bad situation, but was completely knocked back by the price of proper aftermarket parts. Many cars in our class are running the APR GT1000, which retails at $3700+ the cost of custom mounts. Most others are running custom designed and built items that run far deeper into the thousands.

A decent splitter starts at $800+ the cost and lead time of getting a custom one and the hassle of mounting it. Andrew Brilliant, the mastermind behind pretty much every top 10 WTAC Car, offers aero advice sessions starting at $2000. It became clear really quick that we wouldn’t be able to afford proper aftermarket gear or professional advice.

I just went the safe bet by making this stuff as big as possible, using the best information I could find, so even if it’s not as perfectally efficient as everybody else’s, the net result would theoretically be a positive one. Looks wasn’t really a consideration which is how i think it should be on a race car.

In all honesty I don’t actually know if it’s going to be worth the hassle. The car could be riding on bump stops throwing sparks down the straights and handling like its on rails around the bends... or it could completely upset the car’s balance and make it an undriveable turd. We might be stripping this stuff off after the first session never to be seen again. At this point, anybody’s guess is as good as mine.

On the off chance though, that it does work... And that it does make this mammoth of a race car just one second faster around that new course, then I’ll be heralding it as a massive success. It’s going to look ridiculous. It’s going to have people literally pointing and laughing at it. I don’t care. :cool:

We’ve gone out on a wing here (pun!) and done something so far out of the ordinary that it’s going to put smiles on faces. And even if they’re laughing at us and not with us, we’ll laugh along; because at the end of the day this has been a fantastic learning experience and a lot of fun for the both of us. I know that dad’s had a lot of fun constantly reminding me of how stupid it’s going to look :lol:

And who knows... maybe it will work? Maybe we’ll take the knowledge from this car and come back in a few years with something lighter, crazier and possibly even somewhat competitive? Nothing is off the table at this point.

In the meantime it’s all in good fun and I’m excited not just for the time attack, but for the proper testing, the tuning, the modding, the tweaking and the conversations that these parts will undoubtedly create. It’s all brand new to us and it opens up a very exciting door for a different way of making cars go faster. :D

Oh and I’m honestly pretty excited to see how it all looks on the car too. Even though it is all pretty silly :lol:
 
Another cool arrival... I picked up my wing mounts today.
6FEE9C59-F085-4894-9C48-4E1B11FFF507.jpeg
Done to my design in 8mm plate by a local CNC shop, these 4 pieces of 8mm aluminium cost me a pretty penny at $200. Tempted though I was to save money, I decided it wasn’t worth skimping on safety. The dimensions are currently at the maximum allowed, but I fully expect dad to take an angle grinder to these at some time soon :lol:
B20FDF7F-DF7D-4618-94D1-5CBB919ED055.jpeg
This should give you a bit of an idea of how the blades will fit in place. In retrospect the endplates should’ve been a bit bigger to allow for more adjustment, but this setup will allow for the theoretical optimum angles on both blades.
907C5D54-7EE2-4B6A-AEFD-1E780AA180B8.jpeg
It’s coming together nicely :)
 
Last edited:
The wing is getting there slowly and I’ll talk about that later, but today I have exciting news. We have some new wheels and tyres! :D
BAEBA05A-ABF5-4B67-8785-BD38C6BFB65F.jpeg

I saw these 18x9.5 +38 ROTA wheels come up for sale recently, and while I’m not a fan of ROTA, or their bad habit of ripping off wheel designs, the price and size on these were right. What made the deal much, much sweeter was the rubber they came fitted with. Yokohama Advan A050s In 265/35/18 with a decent amount of tread left and a 2016 build date.
78D18F1A-0F4C-4782-919A-06F77AAE373C.jpeg
These are some of the absolute best semi slicks money can buy, and being significantly wider than the Nangkangs we are currently running, I expect a massive improvement in outright grip. Fitment may be interesting, but if required we will fit spacers and flare guards to make them ft. Very exciting to say the least and one of the things I was most desperate to address before the time Attack :D
6C086137-9B5D-4355-9422-1256C5F1C2F8.jpeg
Speaking of, The Bend had their first ever track day last weekend and videos are beginning to emerge of the track. The below is an onboard with the SJ1000, a widebodied ‘16 STI capable of making (you guessed it) 1000BHP. The course is exactly the one we’ll be running in a couple weeks time and this car is tipped as one of the favourites to win the event.

It’s so exciting to finally see this track up and running and to think i’ll be hurtling down that massive back straight in just a couple weeks has me extremely excited and just a little bit terrified :lol:
 
So... Fibreglassing. A true art and talent that, no matter how many times I do it, I still learn new things every single time. I’m also always reminded of how untalented and non-artistic I am :lol:

A quick tip I figured out this time was that by covering a piece of cardboard with packing tape, you can stop your parts sticking to your work bench, which causes damage to everything involved.
901C17B2-2818-4A99-A0B5-DA40367CA473.jpeg
First off, I gave all 4 pieces a couple layers on one side, then left it to dry for a day.
Then I did the same on the reverse, before leaving it to dry for a day
Next was a couple layers on the fronts, overlapping both sides, which I left to dry for a day.
Finally I did a few on the tail, which I predictably left to dry for a day. When all was said and done, the blades were impressively strong and solid.
69327D11-C7F1-432F-BCF0-76D0777AD8B8.jpeg
A lot of sanding came next, thanks to my orbital sander and 80grit paper. With them smooth enough, and with excess pieces trimmed off, I inserted the solid aluminium inner structures and fibreglassed the 4 halves into two solid wings. In retrospect, I wish I didn’t have to cut the wings in half in the first place, as this step wouldn’t have been required. I would’ve saved on resin, cloth, time and weight along with the headache I’m going to have making sure that everything ends up straight and true. Another valuable lesson learnt.
935A0E58-1436-48FB-86E8-495F8B597489.jpeg

Next up comes (a lot) more machine sanding, followed by trimming them to final length, a final coat of cloth, before finally tapping the threads in the aluminium so they can be mounted :)

The Chrysler is booked in at the dyno shop for Monday and I’m heading down to help dad on the weekend with a few finishing touches, including test fitting the Rotas. It’s all starting to ramp up now with just 18 days until the event.
 
Despite being 2 inches wider front and rear, and using a 5x114.3 stud, rather than the Chrysler’s 5x115, the wheels bolted straight on.

We played around with the ride height a bit and settled on a 5mm raise at the front and 10mm raise at the back to give the car the clearance it would need for the splitter and the very low hanging LSD. Surprisngly the 35 profile Advans and 40 profile Nangkangs were pretty much he same height as each other. Tyre sizing is confusing :confused:
FF28D6D9-B861-40C8-9FF3-91C2EE375C9B.jpeg
We also removed the splitter and front bar to make the car easier to load on the trailer.
60B630AF-4EAA-42B6-B765-C7E3BC10D457.jpeg
Then it was a few more quiet tidy up jobs here and there, a quick play on my parents gravel driveway, and we put it on the trailer. Side note- I’m glad it’s not a rally car because I genuinely felt like I was ice skating :lol:
E2382819-B512-47A2-82C7-2CCF1F2962E7.jpeg
A quick squirt off with the pressure washer, and I was on my way. 4 hour drive on the highway and an hour each way trough traffic this morning got her safely to the dyno shop. The guys are installing a Link Thunder ECU, giving us various features like traction control (which I said was fine as long as it came with an off switch), flat floor shifting, full control of all engine vitals and monitoring capabilities, including gauge read outs which we will put through a windows tablet. It will also put to bed the over-rev issue we’ve been having with the car since the start.

They are also converting the car to run on Ethanol E85 fuel, removing the rev limiter and installing a big handful of new sensors. Apparently it’s the first time Link have heard of someone using their ECU in a Chrysler, so we’ll add that to the pile of 1sts for this car I guess :lol:. This is easily the most expensive service this car has ever undertaken, but we are hopeful it will produce some very impressive results.
61C4E6F8-E895-4D27-8A9C-2D8AD29BCCC8.jpeg
 
Last edited:
The Chrysler is still at the dyno shop, but the good news is that the computer is up and running and the car now runs on E85 fuel. So far the best run was the below...
67618474-C7B9-45DF-B456-9B4900550421.jpeg

Which was hindered by the alternator dropping in voltage and making the engine run rough, causing them to stop the run at 358KW & 4300RPM. An auto electrician is fixing the alternator for us, and it’s fair to say that with 3000rpm and a fair bit of boost left to go, this thing will be making some incredible numbers.

The Chrysler and I were also featured on the events Facebook page. I think there’s a few people interested in seeing how it goes! :)


The wing hit a hault because no matter how much resin and glass I put between the halves (where I’d cut it so it’d fit in the Ute) it was flexing in the middle. I had nightmares of this leading to a crack and complete destruction, so elected to start again. I had Coolfoam cut me another blade, this one with a 40cm chord and using round central supports rather than the rectangles that I (for some reason) opted for on the first attempt. I’ll run this as a single element design on the weekend.

I’m hitting it with several layers of fibreglass, while the endplates are at a shop being professionally welded.
24D373A2-13AB-4890-8576-635460D8075F.jpeg

The car will hopefully be finished at the dyno tomorrow, getting a wheel alignment on Friday, then some tidy up jobs on Saturday before the event on Sunday :D
 
The dyno shop finally finished with the car late on Friday afternoon. We have nothing but praise for Damien at Graham West workshops, and how he managed to get this thing ready with the barrage of problems it presented is a credit to him. The car ended up at a safe 450RWKW, which puts us somewhere around 750BHP as measured by a manufacturer. That’s more than a Hellcat in a car that weighs (this feels weird to say) a fair bit less. He said there’s more he could do with timing to drag out a fair bit more, but didn’t want to get too aggressive with the car’s intended purpose in mind. Here’s a shot of our new fuel system they put together :)
803D4A01-3532-420C-AF27-412E0860FDE5.jpeg

Saturday, from sunrise to well past sunset, was all about the finishing touches. We dragged the car 40km away to the only shop that could get us in on a Saturday morning, who happened to have experience setting up drift cars. This is where the alignment ended up....
B87C9DD1-DBA0-429A-89E2-901E05AFBE7B.jpeg
The car had managed to crack the alloy header tank that came with our procharger kit while on the dyno. Luckily our wheel aligner knew a guy, and gave him a call. After driving way out into the sticks on gravel roads, we found his workshop, where he’d came in to work just for us. It was very much appreciated and it never ceases to amaze me how people are happy to help get a race car to the track on time!
D1FDD545-7E88-4624-BB2D-05D9D8FEB189.jpeg
Finally getting the car back to our workshop after lunch time we could get to work. We made up alluminium panels to seperate the drivers compartment from the boot and used tech screws and silicone to attach them. The splitter and front bumper had to be remounted, which was an incredibly difficult job. When I told dad that we needed to be able to stand on the splitter, he listened. The mounts he’s created are so strong and so various, that getting every piece in place took a good couple of hours. The good news is that we managed to load it on the trailer in tact, so shouldn’t have to take it off again any time soon.

Then we turned attention to my wing. My mounts arrived from the welder on Friday...
A5F1EFD7-CCB7-4AB7-88E0-DEABA96C4E66.jpeg
And I’d been up until the late hours of Thursday covering the blade with 4 layers of fibreglass on every section. The off cuts from the foam shop made for brilliant wing holders :)
1A64D693-2157-4A20-BE24-D1680E96C00E.jpeg
I was halfway through sanding it back when dad told me that I was out of time and if it was going on, it had to go on now. It looked pretty rough and I was disappointed to call it a finished product but by then it was past 10pm and we needed to be up by 5. We tapped holes in my solid alluminium rods, bolted the mounts to the wing (just guessing that the angle was close to 0*) and then set about bolting the wing to the boot.
3ADCB59F-0F8A-4A17-82F1-BB8B557458FC.jpeg
It took hours to get the position right, the mounts trimmed and the holes drilled to make it fit. We used some offcuts of ally plate to act as washers for the underside and with some flexibility (because our boot can now only open about 20cm) we managed to firmly bolt it in place.
A5CA16AE-AE07-4143-AAC2-90604D25522E.jpeg
We then looked at the angle, realised it was approximately -15* and decided to change the rear mounting hole. The ease of doing this is the main reason I wanted to mount the wing via its end plates. A quick measure, drill two holes, undo the rear bolts and loosen the front, twist into place and tighten back up. A 5 minute job. These holes put the wing around a positive 10* angle. Which, with a 40cm chord and extremely efficient profile, should make plenty of downforce.

Then it was just a quick coat of matte black (we didn’t even mask the car :lol:) and it was off to bed. Finally finishing the car at 1am.
496F10C7-6B2C-4971-931E-EC6EB90AE645.jpeg
The next day started with a mad dash to pack up tools and load the car on the trailer. We hit the road, stopping at the last service station to carry E85 and filling up the car and 5 jerry cans. We made the track quite late so I ran off to sort out the paperwork while dad started unloading the car. I came back, got it through tech then went back to our garage to do our final prep.
5542AA5D-66D4-43D9-B1D8-1EE2057CE6CE.jpeg
Unfortunately the adapter cable id got to plug my windows tablet into our new ecu and act as a dash, was the wrong one so I would have no gauges. With no information at all we discussed skipping the first few runs, taking the couple hour drive to get another adaptor, then coming back.
21EC53E3-01AA-4505-8631-90C2F66EC05D.jpeg
We decided we were in too deep to back down now and I lined up at the back of the fastest group ready for my first session. After a long wait we left the pits and I got my first taste of the car. Even barely touching the throttle and shifting extremely early (no RPM gauge so played it safe) it felt like a rocket ship. I took the first handful of corners matching speed with the cars in front, still being miles from the limit of grip. We’d finally done it, I’m finally here! Brand new racetrack, properly built race car, all day to have as much fun as possible!
987988F9-B67B-4F73-862C-9D50E68F98C3.jpeg
I felt the excitement as I hit the throttle out of the 5th corner on the track and then I heard it. TANG, TING TING TING TING TANG! So loud and direct that I knew we had a serious problem.

I checked my mirror, and seeing shrapnel flying up, I hoped for a flat tyre while I gently coasted away and brought the car to a safe stop off of a service road. As far out of the way of the track as possible. I got out of the car, checked the tyres- all were fine, then looked underneath it, to see that the tail shaft had snapped and was sitting on the ground.

I rang dad and told him the bad news, then waited patiently for the tow back to the pits. I was deemed far enough out of the way for the racing to continue while A freindly couple of Marshall’s gave me a guided tour of the new 8km long GT circuit... Accompanied the whole way by the dragging of the shaft on the ground. I assure you It was exactly as frustrating as it sounds.
05DA3D4E-EA53-4383-BC6C-CF8EB93966F5.jpeg
I eventually got back to the pits, we had a closer look at the shaft, deemed it irreparable, then loaded it up and went to watch everyone else have fun.
7C9CA71D-740B-46EA-85E8-A1C611A2991A.jpeg
Sometimes you can prepare for something for months- I started designing the wing especially for this event over a year ago; we were up until the morning getting it ready; we had a lot of people go to a lot of trouble to help us out... and nothing you do can do will stop fate intervening. Dad sees it as lucky, without the knowledge of the gauges I could’ve done far more damage than a busted shaft. But it’s hard to see it that way when we were so close. So close to the perfect day, the perfect experience and something I’ve been wanting to do my whole life. Gutted doesn’t even begin to describe it.
3893D86C-37EF-4218-8FB2-39D0F3A32435.jpeg
It’s an amazing circuit, the car felt great in my extremely brief run and I am very happy to see the wing mounted up and solid after putting so much planning, work and thought into it. We have unfinished business here now and rest assured, that once the tailshaft is back in one piece, we WILL be back for a trackday. And when the Time Attack rolls around next year, we WILL be prepared.
25B06F5D-79E3-46FE-8E24-5B72D190F23E.jpeg

Thanks for reading :gtpflag:
 
Last edited:
With the snapped tailshaft welded back together...
459EFB58-3A4A-4E69-8FA8-567393DF7189.jpeg
Yesterday we headed out to Mallala for an open track day. Im very pleased to say that for once everything went on pretty smoothly! We had issues with temperature throughout the day, hitting 110* as I came off the track at one point. We’re putting this down to cheap nasty coolant, only having 1 of our 2 thermos fans working and having the intercooler blocking air from hitting the radiator.

Intake air temps were hitting up to 54* on a day of 22* weather. We think that’s a little high, so are running through a couple ways to lower the temps in the engine bay.
7B0910CA-C2DC-4443-9FCD-B86F6AEADE29.jpeg

As for the driving experience... where do i start? This thing is an absoloute monster! The acceleration out of the corners had me flyin past everything on the track and the grip is simply unbelievable. A car that weighs not far from 2 tonne should not be able to hang on like this thing does!
B87AD63C-F72F-464B-9293-CBA2A00698F1.jpeg
The tyres are definitely playing their part but I actually am confident to say, so is my wing :D! At the high speed kink of the track, at around 180kph the car was pushing wide due to the massive downforce on the rear compared to the small splitter that we have. If you look closely at this image, you can see the wing bowing in the middle and the mounts being pushed downward. It works! :D :D :D
896E527A-1545-421E-85CC-7938210B41FA.jpeg

Lap time wise, the car’s best was a 1.16. That puts it around 6 seconds off the GT car record, 7 from a V8 Supercar and 10 from the Time Attack record... All in its first track day, with plenty of fine tuning left to go and a lot of time left on the track. This thing is so damn quick! :gtpflag:
7BE8E11B-5113-4FC1-AEA7-548E4B5E99F1.jpeg
I’ve started an Instagram for the car #superbird300c so if you guys ever feel like you need more big winged luxury barge in your life, feel free to check it out! :)


145EAA41-04BB-4DBE-A913-51D8ACE3F983.jpeg 93E5A48F-15C0-4921-B0F3-23ACE5ED256C.jpeg 5B9203A4-5250-4EAE-88FD-A4BDE395AC24.jpeg
 
Last edited:
This car is awesome!
Definitely not the obvious choice for a time attack car, and I love that massive (and functional) wing on the back.
Keep up the good work! :D
 
10 out of 10 for awesomeness. Like the Superstars V8 300C only cooler and with added supercharger 👍👍
 
Hey mate, looking good - when's the next outing?
Dad’s been busy building a bonnet duct for the intake, so once he finishes that we should be booked into the next available trackday. Now that The Bend is hosting their own sessions and Mallala has been bought out by the same people; there seems to be something happening at one or the other every couple of weekends. I’m very excited to get back out there and really give it a hammering :)

Once we get a couple more testing sessions under our belt we’ve got a bit of a wishlist of events coming up...

12th Aug- MSCA Supersprint- Winton
22nd Sep- MSCA Supersprint- Phillip Island
10/11th November- Legends of the Lakes
24/25th November- Geelong Revival
1/2nd December- Adelaide Motorsport Festival (we’ve officially applied but the bar is very high and we aren’t expecting to make the cut)
9th December- Wilunga Hillclimb

How many we actually get to do remains to be seen, but it’s very exciting to think about :D


Thanks everybody for the kind words! We love seeing people enjoy the car and it help makes taking the hard path that little bit more worthwhile. :gtpflag:

While I’m here, as mentioned earlier, dad’s building a bonnet duct to reduce intake temps. He’s just got to do some minor fitment adjustments, fit our scoop and it’s all done :)
3805CFC6-166B-4AD1-9826-5FA46AD8E5C5.jpeg
D4F4DBC6-031C-44EF-989F-E829C85D7E10.jpeg
7FA72129-F245-4F3F-A467-FC2471238753.jpeg 4F594DD5-9F2C-4FB3-BFAE-A68523DA1E79.jpeg
D0FF99AC-A0F5-4428-97A0-1495C147D85F.jpeg
B30F724D-8EA7-4239-B3F8-82C4A05F492C.jpeg
 
The wing mounts have had there edges ground back to remove sharp edges and improve airflow around them.
F08FF560-5718-4741-AEB9-7881D3E3B807.jpeg
We’ve also improved the front aero, with some basic tyre spats. Keeping air away from the tyres is a great way to reduce drag and the sloped surface will also work with the splitter to create more downforce.

Here’s the masking tape template...
882BD651-9A49-4A47-A410-5A30545C649B.jpeg
And the aluminium finished product...
D41502F1-4FB0-478A-9484-60121EDEB1CC.jpeg

We have completed our entry for the Geelong Revival Sprints- Australia’s largest gathering of interesting and classic cars. The sprint is a curved quarter mile run near the beautiful foreshore. November 23 can’t come soon enough :)
9EE0BC43-2A2C-44AE-BD95-006D9B4EB5E4.jpeg
 
So a fair bit has been happening on the car front as of late. First things first, I’ve got somewhere to park them!
71407146-C01C-4D11-888D-38FBA01F153E.jpeg
My home construction was completed last month and we are finally all moved in and settled. After 3 years of storing it at disgusting, dirty worksites, I can’t describe how fantastic it is to finally have my Zed under the same roof as me :D
AE18892F-63E1-453E-A9EA-74B17154D579.jpeg
My first mission is to give it a very good and thorough clean, obviously. Then I’ll turn my attention to getting it up and running 100%. After much reflection and thought, I feel like a full, OEM+ spec rebuild is the best option I have. While it’s out I’ll also be doing all the plenum deletes, a timing belt service, a new wiring harness and all the other important little jobs. I am still debating if I’ll carry this out myself or if i’ll pull the engine and get somebody else to do the important work; but the $5000 difference in price is making me lean toward tackling it myself.

Onto the Chrysler, and the aero tweaks continue. Dad has built some aluminium fender fences for the front, to aid in downforce creation.
F03B373F-0D4D-49B9-AD02-B3969875D6E0.jpeg

And sent the wing back up to me so I can attempt to improve its finish. So far I’ve sanded it back and coated it in spray putty. When all is said and done it will be made perfectly smooth before I coat it with real carbon fibre and high quality clear resin. I’ve never worked with CF before and it’s horrendously expensive. But I’m hoping it all turns out okay :)
6FEA15DD-A04C-4452-905B-F58831EE0FA8.jpeg E6E5C96D-E692-40BC-8554-6F88DBD6FC11.jpeg 8FB28EDE-822C-46F7-B4B1-9D13D7177731.jpeg

Most excitedly our crazy November gets crazier with our acceptance for the Adelaide Motorsport festival! We absolutely did not expect to get the nod for this, and while dad and I walked around the event last year; between La Ferrari’s, Formula 1 cars and V8 supercar drivers we laughed our 🤬 off at the joke that we could one day be there in our dirty little 300c. I guess the jokes on us :lol:

If you want to follow the Chrysler more closely, make sure you follow us on Instagram. I post on there very regularly about all the work that goes on behind the scenes :)
 
Last edited:
Man it’s been a while since I updated this! There’s a lot to say so I’ll try to keep it brief.

My Partner, Lana and our sausage dog, Zed (yes, seriously :lol:) gave me a hand with the wing.
88A85888-15EA-42CE-8719-51B8C17EFF9F.jpeg
I sanded it dead smooth...
40C8C164-B3E2-4D00-97D9-F2CDE3BEBE13.jpeg
Then coated it with a layer of very expensive clear resin...
0CB654B4-2038-45FA-920B-10867246B2C7.jpeg
B02194ED-A391-4DEF-957F-5042F3A6D66C.jpeg
Let it dry, hung it up, coated it again, then we very carefully hand laid the carbon fibre.
810480D2-7999-4136-B4E6-C26861D47A44.jpeg
It’s not perfect, took several hours, much frustration and covered my brand new garage floor in resin, but we now have that real carbon strength and look. Silly as it sounds, it was something of a dream come true working with this material and I’m very keen to use it again and experiment with vacuum bagging.
54278E71-EB76-47F6-8255-364CEED31005.jpeg
With the wing done, we got our brake rotors machined, got some new pads and it was off to the brand new Bend Motorsport Park to settle the business we started when we snapped our tail shaft on the first lap of SA time attack.
37A0597D-14F8-4E44-92A8-D80160C5EA5C.jpeg
The track is phenomenal. Fast, flowing, challenging and all around excellent. Unfortunately the machining has t fixed the rotors and the brakes were completely useless all day. With that in mind I didn’t push too hard, but still had a whole lot of fun.
41313862-654A-457E-BB2E-CEF09DC2695F.jpeg
That was it for a while, until dad decided 3 weeks ago that it was a perfect time for a respray.
68BEBC47-0278-44C9-B979-A9E2FE0AD5D7.jpeg
We went matte black again, however the paint reacted with our previous coat and dad ended up sanding the whole thing back to near bare metal. We’d previously mixed up some semi gloss black with purple and yellow glitter from a craft shop (again, seriously :lol:) that we’d intended to use on the scoop splitter and wing.
11365247-9924-437E-B1C8-4B23610845C9.jpeg
In desperate times, we decided to spray the whole car with it, and honestly we couldn’t be happier!
B3031094-5D61-456D-BA1D-D018C035C4D8.jpeg
After that we got some new rotors, and took the car back to our tuner for a proper unleashing session. To everybody’s shock it made a massive 503RWKW which is in the region of 825BHP at the flywheel. To think the engine we built is now just shy of 1000BHP is just pure insanity. To contain the horses, we got some nice, new Advan A050 tyres to replace our second hand ones which had copped a battering at the Bend.
EA92466C-DA39-4847-985C-050F18B7738F.jpeg

After that it was off to Legend of the Lakes hillclimb. Last year we managed to just edge out the time I’d set in my GT86 the previous year with a 1.03.26. Expectations were high, with the added power, LSD, Aero and better tyres being the main improvements. My aim was to get a 59.
ACA85B2D-5087-43A8-BF81-FA665A759C6B.jpeg
After two days and with two runs to go I had cracked the barrier twice but neither counted. A 59.95 was cancelled due to a regulation after a bad accident prevented some competitors getting a run. A 58.9 was ruined by a penalty when I flattened a cone at the top of the hill.
36F5210F-7EEC-42F8-8269-FB3A6EB23384.jpeg
The second to last run was feeling good until I lifted the throttle on the hill ascent at around 160kph and the back end stepped out. I caught it, just, but with the fear of death in my eye, I took it easy to complete the run. Despite that, I’d successfully hit a 59 second run and I felt like a weight was lifted from my shoulders.
DADDFCCC-9C44-4E81-8FDB-9AA3B4AF8D31.jpeg
In preparation for the final run, we borrowed a drill from a neighbour and added some new holes in the wing’s endplates so we could really crank the angle and try to keep the tail in check. A friend told me good luck and in reply, for the first time in my life, I said “I’m just gonna 🤬 send it!”
50DA8D6D-06E6-4F01-B181-EB917AE7ED3B.jpeg
And send it, I 🤬 did. The first half of the course felt near perfect, with the added downforce/placebo of the wing adjustment planting the rear and allowing me to carry far more speed than ever before. I messed it up at the top, compression locking into the technical “bus stop” section, then failing to get it back in the power band after the u-turn. It didn’t matter though, I’d hit a 57.9 and I was ecstatic.
4B2DBF2C-08C3-41B5-9327-8983AFDEEAED.jpeg
A 5 second improvement on last year, 4th in class (2 tenths off a trophy) and 34th overall. Dad apparently leaped to his feet watching the run on the big screens and seeing the time come up. It was a perfect end to a great weekend. :D

And that brings us up to today. Tomorrow is the Geelong revival and next weekend is the Adelaide Motorsport festival. Look forward to updates about those in 3 months time :lol:
 
Last edited:
Back