Hot Wheels and Matchbox Customizing Thread

  • Thread starter CodeRedR51
  • 9,230 comments
  • 1,223,540 views
Hello,
Unfortunatly the windshield is irrecoverable damaged. The next step is to restore them.

Very very welcome! Glad to see our little corner still provides inspiration for newcomers.

As for your windshield... if it isn't cracked, it might be recoverable. Get some brake fluid off of Wal Mart or something and simply drop the windshield piece in there for a whole day. The paint should wash off it completely. Give it a try, as you will neve be able to reproduce the complex form of that windshield in any other way.

After the paint is gone you can either buff out the windshield with head-lamp polish, or give it a Future bath, and your glasswill be perfect again 👍
 
Got a few more hope you like.
This one lowered and detailed.
244azbo.jpg

2myaoef.jpg

bgeluh.jpg


This one resprayed yellow,lowered and detailed.
oh1fti.jpg

34g0kme.jpg

30myaz4.jpg


This one is resprayed same yellow,lowered and detailed.
34xqk44.jpg

28lq2c8.jpg

mh4oxs.jpg


Hope you like.
 
I love Japanese nostalgic cars and Iam torn between Nissan and Subaru so I got a 1989 r31 skyline and a 2001 wrx, got them both covered lol.

Here's a wrx resprayed to look like a evo club spec, lowered and detailed, custom exhaust.
efnf2p.jpg

2mcw1uf.jpg

im0zrq.jpg


R34 Gtr, resprayed,lowered,wheel swap and detailed.
2i0zpyv.jpg

s1nw5u.jpg

295pmi0.jpg


Another escort but this time I made my own custom front bumper which I think works well with the car.
20kpq49.jpg

This yellow one is the stock front bumper your left with once you remove the hidious rally lights and fill the holes.
2mmxwr8.jpg

2wpl56t.jpg

ohjl2.jpg


Some more spam for ya lol
 
Last edited:
Hey guys first time post, long time lurker. Been getting back into the customizing game after finding my old models and cars. Heres a few of my first attempts. Any critisizm good or bad is appreciated. Some beautiful work on here, and im glad to have finally join.

Quite welcome! Nice first post, I really like the candy painton the Camino. Shot it yourself?

Another escort but this time I made my own custom front bumper which I think works well with the car.

Care to elaborate how you did it? Looks great!
 
Quite welcome! Nice first post, I really like the candy painton the Camino. Shot it yourself?

Yes its duplicolor anodized red. I just use rattle cans for now. Always had a nack for laying down paint. Im not a pro by any means but i used to do body work at a small car dealer so I dialed it in pretty well. Still have my share of screw ups though. Heres a few more.
FB_IMG_1462661661756.jpg
FB_IMG_1462661637611.jpg
FB_IMG_1462661614201.jpg
FB_IMG_1462661532608.jpg
FB_IMG_1462661348096.jpg
 

Attachments

  • FB_IMG_1462661625996.jpg
    FB_IMG_1462661625996.jpg
    14.5 KB · Views: 21
  • FB_IMG_1462661661756.jpg
    FB_IMG_1462661661756.jpg
    15.1 KB · Views: 18
  • FB_IMG_1462661637611.jpg
    FB_IMG_1462661637611.jpg
    15.2 KB · Views: 19
  • FB_IMG_1462661617841.jpg
    FB_IMG_1462661617841.jpg
    14.8 KB · Views: 24
  • FB_IMG_1462661614201.jpg
    FB_IMG_1462661614201.jpg
    13 KB · Views: 18
  • FB_IMG_1462661348096.jpg
    FB_IMG_1462661348096.jpg
    14.5 KB · Views: 22
@Cano

The escort front bumper was made from another rear bumper from another escort, just simply cut to fit and glued to bottom chassis, had to cut away the original split bumper and cut the new one to fit your old cut if you know what I mean? Had to cut away a fraction of the body under the middle under the 3 round air holes as it dropped down and wouldn't give the bumper a flush look. So that had to be trimmed, the hardest part was putting the bumper centre and
Clamp it while glue dried, easy easy mod that looks a lot harder than it is and makes it look a million bucks IMO. One of the quickest cosmetic changes that makes a massive impact.


@Alex

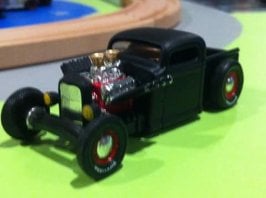
That matte black rat rod looks sick.
 
Last edited:
Man what I find, been wanting stuff like this for ages. Someone be the guinea pig for Australia to lol. Thanks for sharing, must appreciated like gas monkey says
"Get me some of that" lol
 
@R1600Turbo

I'll be a guinea pig. Cheers for the heads-up. 👍

(edit)

Ordered 2 sets. The American style deluxe kit and the Wheel set. Cost around £23 (including shipping), which isn't too bad, as it would probably cost me that to buy 2 or 3 real rider cars, that and I'd most likely have to source from outside the UK. Was going to get the JDM set too, but there wasn't quite enough want.

Shipping's about 21 days for me, so quite a long time, but I'll let you know what they're like when I eventually get them. 👍
 
Last edited:
I finally got all the tools needed to get started and began my 1st project last weekend. Using the brass tube method, I went as far as fitting the cut axles into the tube and crimping the ends. Problem is I couldn't get the axles to stay crimped as one would come off while trying to fit it into the chassis. Also for some reason the chassis wouldn't fit flush with the body eve though the tube wasn't touching anything. Is this normal or am I doing something wrong? I searched for videos showing the brass tube method but couldn't find anything so any advice would be much appreciated

image.jpeg
 
Yeah crimping becomes tricky when you're working with shorter lengths.

From what I see in the photo provided, you could probably use a longer tube. A common practice I do is to make its length the shortest length I'd ever want to the wheels to be at. In other words, what you have right now lets the wheels move in still (if we disregard the base); there's still room for play.

I like to eliminate that, just so the tires don't scrape the base, and I'm getting at much tubing I can get without changing the overall axle length. Crimp both ends to hold both pieces of the HW's stock axle. The longer tubing should give you more breathing space.

As for the flushness, are you saying the tubing doesn't sit all the way down to the base? If so, shouldn't it be obvious why? The groove it's sitting on is likely not large enough to fit the tubing.

Work at it with a mini flat file, preferably one that's coarse and not diamond such as this:

SunRed-BESTIR-taiwan-5-180mm-mini-diamond-flat-file-metal-Sharpening-hand-tools-NO-07005-freeshipping.jpg


And obviously the thickness should ideally be the width of the axle groove.

Well not that obvious to me since it's the 1st time trying anything that requires a trip to Hobby Lobby, but I appreciate you clarifying what I was doing wrong, thanks 👍
 
A lot of interior trimming is needed to either lower the car or swap axles with tubing in them. Every time I lower my cars anyway I grind away the plastic clamps that hold the axle in then go about tidying up the areas they were held in be just running the dremel with a small grinding disk over the area to remove loose debris. Then I run the disk through the area where the tube is also, much like the file technique mentioned. Then I take the interior like the seats and stuff and trim a few mms of where the plastic wheel pins are on the the bottom which usually means shaving them completely away. Doing this will not alone allow your car to sit at the lowest possible height also when shutting the car back up, there's nothing your fighting against like you were explaining with the tube. Hardly none of my cars roll though as there all lowered heaps but there models now not toys so I don't see why they need to roll tbh, there only there to look at. The only trick is to make sure you don't shave to much interior away otherwise it sits to low inside the car and just looks wrong.
 
A lot of interior trimming is needed to either lower the car or swap axles with tubing in them. Every time I lower my cars anyway I grind away the plastic clamps that hold the axle in then go about tidying up the areas they were held in be just running the dremel with a small grinding disk over the area to remove loose debris. Then I run the disk through the area where the tube is also, much like the file technique mentioned. Then I take the interior like the seats and stuff and trim a few mms of where the plastic wheel pins are on the the bottom which usually means shaving them completely away. Doing this will not alone allow your car to sit at the lowest possible height also when shutting the car back up, there's nothing your fighting against like you were explaining with the tube. Hardly none of my cars roll though as there all lowered heaps but there models now not toys so I don't see why they need to roll tbh, there only there to look at. The only trick is to make sure you don't shave to much interior away otherwise it sits to low inside the car and just looks wrong.


To be honest I wasn't sure if it was a good idea for me to get into customizing after things started to get a bit frustrating. But thanks to you and AOS I know what I've been doing wrong.

I know it's a lot simpler if you don't bother with the wheels spinning but it's just a matter of personal preference. To each's own I guess

Again thanks for the tips 👍
 
Not having your wheels spin is the easy way out of producing work here, but going the extra mile is always up to the maker. Yeah it's not a toy, but when you have one HW that can still roll beside one that cannot, you start to see the beauty of how much greater something is - not looks - when the extra effort has been taken. It's something you can begin/learn to appreciate.


I used to not care about detailing the base. I still don't for the most part, but I did detail the base on one project I got very engaged with, and in the end result, the project feels more complete than it would have if I had left it uncoloured on the bottom. I would come back to my customs years down the road and I can now see where I've been lazy, and that's not something I can be proud of.
 
To be honest I wasn't sure if it was a good idea for me to get into customizing after things started to get a bit frustrating. But thanks to you and AOS I know what I've been doing wrong.

I know it's a lot simpler if you don't bother with the wheels spinning but it's just a matter of personal preference. To each's own I guess

Again thanks for the tips 👍

Now worries mate, Iam just doing to you what people here did to me. That's what's good about this place, anyone is keen to help anyone. I didn't really have an idea when I started either, knew what I wanted it to look like but getting it there was something else, with the help of others here plus a few neat tricks you pick up yourself along the way, it gets a lot easier.

@AOS

I know what you mean about a rolling car but if I did that I wouldn't be able to get the desired look I want on most my projects so id rather sacrifice the roll than the stance comcidering it's only going to get looked at and not played with anyway, plus Iam making a diorama ATM and not having rolling cars, really helps me lol.
 
Just a simple mod I did today:


Before:

26558079025_e48bb4b2b3_c.jpg


After:


27062336481_1d65a5c290_c.jpg


Sourced the Cibie lights from a Jada Initial D AE86 Trueno. It isn't perfect though, as excess glue went to the left turn signal light, and when I used the super glue remover, the orange paint came along with it. :ouch: So I decided to just cover the signal lights by painting them black.


At least it now has the look of the 930 Turbo...
 
Nice but may I ask you why you butchered a jada takumi 86? There worth some $$$ now. I made my own on my gtr a few posts above, there easy and could've saved you your trueno bro. But anyway, Porsche looks nice, similar to "black bird" from wangan midnight.
 
Nice but may I ask you why you butchered a jada takumi 86? There worth some $$$ now. I made my own on my gtr a few posts above, there easy and could've saved you your trueno bro. But anyway, Porsche looks nice, similar to "black bird" from wangan midnight.


I expect that kind of reaction, and yes I had to take off those lights from the Initial D AE86.

But I find that car overrated to my taste, and since I won't sell that anyway, it became a not-so-special car in my collection.

I am aware on how expensive it is, but it still is an AE86 at the end of the day.
 
I just did a quick little bit of scratchbuilding to make CM's look a bit better.


Spot it yet?

27112027176_789e875631_z.jpg


The plastic antenna's are 'good enough' for the most part, but I think this looks much nicer. 👍


On a side note, if anyone is missing an antenna for their CM's and doesn't want to make their own, I'm the person to contact. :lol:
 
Last edited:
Hah, it kind of looks like it.

Aluminium tubing and some wire (actually guitar string).
 
Thinking of doing a wheel swap on the Siku Fiat 500. The HW's version is all puttied up and on the to do list, but the Siku version is a bigger cast (around 1:55), and is much nicer overall. The main reason is though, is a far greater choice of wheel options, the HW's version only suits the smallest of wheels (imo).

Can't decide between the two.

 
Back