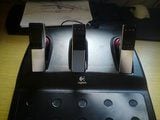
SPIKING PEDALS FIX: Clean your Logitech G25/G27 Pedal Pontentiometers

  • Thread starter iNs3CuRe
  • 106 comments
  • 206,187 views
Does anyone know if/where NEW potentiometers can be purchased from?


There used to be some for sale at www.thesimshop.com but they seem to be sold out at the moment. Leo Bodnar has some for sale, but I'm not 100% sure if they are for Logitech pedal sets, you'd have to ask him.

TOP TIP: If only one of your pots is spiking, then just swap it with the clutch pot. Firstly, the clutch usually has less use so it's practically brand new. Secondly, the bite point of the clutch is far down on the pedal so even if the pot you swap it with is spiking it won't make any difference. Did it to my brake pot years ago & all has been fine ever since!


👍
 
This thread was posted the week after I got my G27, I remember reading it and making a mental note of its existence... The other week my accelerator started spiking but I had no intention of actually doing any racing so I couldn't be bothered to fix it. Now the Reiza Studios sims are on Steam I think I might get Formula Truck soon so I decided to find this guide and fix the pedal - it took an hour (most of that hour was spent trying to find something to clean it with), I used a cotton bud with some nail polish remover (i.e. acetone) on it, lightly wiped the carbon with it and wiped it off again, gently cleaned the wipers with it, put it all back together and it works perfectly.

Thanks!
 
Ok noob question, but what is spiking and how do i know if i have it :confused: i know that that probably sounds really dumb :dunce:
 
Ok noob question, but what is spiking and how do i know if i have it :confused: i know that that probably sounds really dumb :dunce:

Basically, spiking is electrical noise in the pedal potentiometers which will appear to you as false inputs, if you've ever been playing a game with your wheel and the car has accelerated or braked when you weren't telling it to then you probably have spiking pedals.

To test it you could just load a racing game, switch to an external camera and see if the brake lights flicker or if your revs change (I noticed I had spiking when my engine in Assetto Corsa wasn't idling at a constant speed), a more scientific approach would be to plug the wheel in to your PC and use the software to see what the pedals are doing, I know you can do that with Logitech wheels at least.
 
Another way to test if your brakes are spiking is to do a few laps on a track with lots of straights, & then watch the replay in Chase Cam. If you see your brakes flickering on & off when you weren't braking, then there's a problem. I've seen this a few times when racing friends & had to inform them their brake pots were spiking.


👍
 
I was going to clean up my brake pedal pot, but 4 out of 6 of the hex bolts that holds the pedals are loose. No matter what I just can't get it to turn. As a result I can't get past step 1 :banghead: Anyone got any tips for loosening the bolts without resorting to breaking them? Because I'm close to doing that at this point :grumpy:

I'm thinking of lifting the pedals up with the cover, but I don't know how safe that is. Are there any cables that might get pulled if I do that?

EDIT: Nevermind, decided to go for it and open it from the bottom. No cables were pulled thankfully. Didn't get enough access to fully take apart the pedals, but I can reach the pots and gave 'em a good spray of contact cleaner. Hopefully it fixes the issue 👍
 
Last edited:
Thanks for the feedback guys! Im glad I helped ;) 👍

Thanks for putting your knowledge out there for us, it is very much appreciated. I was a little intimidated at the thought of doing the job, but jumped in, and the repair is perfect, I think it may be better than ever. Once again, many thanks.
 
I completed a cleaning of the brake potentiometer yesterday. I probably should have done the accelerator as well even though it wasn't playing up. I used tissues, cotton buds, and a silicone 3-in-1 spray.

From the descriptions in this thread, I thought there would be more blackness left on the tissues and buds. For a small part, I suppose there was enough there. Also found a small spider under my accelerator. :eek:

I also moved my brake and accelerator pedal pads closer together, and the clutch further away. Only just realised that there were three positions available for each pedal. Bonus. :embarrassed:

Thank you for going to the effort of making this guide and the video. Nice job 👍
 
Hi!

So I just registered on the forum especially to say Thank you.

I just finished doing all 3 pedals, too around 2 hours... I am quite cautious as these stuff cost a fortune here.
I had gas pedal problems where even though I was depressing it all the way, it was sometimes triggering only 95% gas, so I wasn't going as fast as I wanted, and also when not touching the gas at all, it was acting like I was pressing just a bit, so couldn't stand in one place without hitting the brake.

Also with the brake pedal it was registering activity even when I was not touching it, slowing me down significantly.

All the problems are now gone.

A tricky part for me was the little metal plate holding the potentiometer where you need to bend it. Yeah bending it to take out was not a problem, but bending it back to hold everything was. Until I figured it out. This took me almost 40 minutes. You kinda have to give it a 90 Degrees angle and then you press the metal into the plastic to secure it. Kinda hard to explain. Oh well.

So,
All in all - I love you, and thanks :)
Happy drifting!
 
Just wanted to say thank you for going to the effort of putting this article together. Just fixed my spiking accelerator pedal which ruined one of my races.

I used Deoxit to clean my pots and in doing so realised that you could make a lazy man's version of this guide where you simply spray a cleaner like deoxit into the pot to clean it without taking everything apart, other than the cover. This could make for a nice stop gap in-between overhauls every few years.

Cheers
 
Since my last post here, my brake pedal has started playing up again. It was only four months ago since I first cleaned the brake pedal potentiometer (as posted in this thread) and the brake pedal has been getting worse over the last month.

The first time I cleaned it, I used a silicon spray to wipe down the surface of the potentiometer and the metal twigs that slide over it. This time I used isopropyl alcohol instead and I cleaned both the brake and clutch potentiometers and then swapped them. I've only put it back together and tried it for a rough function test, but everything seems to be working fine again.

Also, although a lot of black dust came off of the clutch potentiometer (first time it's been cleaned), only a quarter as much came off of the brake one. Perhaps the issue with the brake potentiometer is not that it is dirty but the dirtiness exacerbates an underlying issue.
 
Last edited:
Since my last post here, my brake pedal has started playing up again. It was only four months ago since I first cleaned the brake pedal potentiometer (as posted in this thread) and the brake pedal has been getting worse over the last month.

The first time I cleaned it, I used a silicon spray to wipe down the surface of the potentiometer and the metal twigs that slide over it. This time I used isopropyl alcohol instead and I cleaned both the brake and clutch potentiometers and then swapped them. I've only put it back together and tried it for a rough function test, but everything seems to be working fine again.

Also, although a lot of black dust came off of the clutch potentiometer (first time it's been cleaned), only a quarter as much came off of the brake one. Perhaps the issue with the brake potentiometer is not that it is dirty but the dirtiness exacerbates an underlying issue.

I used Iso alc when I did mine , same time as you did. No problems what so ever. I am thinking that the propellant in the silicon spray you used may have been the culprit?
 
I used Iso alc when I did mine , same time as you did. No problems what so ever. I am thinking that the propellant in the silicon spray you used may have been the culprit?

Glad to hear things are going well still after your cleaning. :)

You are probably right and the problem was caused by the silicon spray or something in it. (I had a quick look for replacement potentiometers the first time I cleaned them and they didn't seem so easy to find, so that's not a path I want to go down.)

Isopropyl alcohol has solved the problem for the moment anyway. I'll report back here if anything changes.
 
I used Iso alc when I did mine , same time as you did. No problems what so ever. I am thinking that the propellant in the silicon spray you used may have been the culprit?


Ugh. The problem is back. It's the same potentiometer that was first in the brake position and is now in the accelerator position. Now the accelerator is doing what the brake used to do. In the accelerator position, of course it's not as big of a problem. It is distracting though.

The potentiometer involved worked OK for a while after each cleaning in the past. This suggests to me that it is mildly defective and over-sensitive to dust.

The only question now is whether I can get another or whether I will have to just take it out and move the clutch potentiometer to the accelerator. I can't leave it in the clutch position until it fails, so deactivating the clutch may be my only choice.
 
So I followed the guide, took my pots out and cleaned them. But now two months later the problem is back, only on the accelerator pedal. Is it possible to just order a new pot? Whats the P/N?
 
I bought a used t500 and I have put over 200hrs on them since I got them. I was getting spiking and less than maximum threshold braking, and they would drag at about 10% after release. I used electrical contact cleaner and cleaned the pots, but it turned out to be a very temporary fix - same experience everyone else seems to have.

So I followed the guide, took my pots out and cleaned them. But now two months later the problem is back, only on the accelerator pedal. Is it possible to just order a new pot? Whats the P/N?

It seems from my research that no one has really figured out what aftermarket pots are replacements for the original thrustmaster ones... So, after 8 emails back and forth to thrustmaster I was given a price of 28 Euro's for the brake pot to be sent from EU to CAN. The part number is 574654IP.

I haven't received the part (prob 2 weeks or so yet) but I have noticed that the wires that connect to the pot are soldered on. Is that how they come from thrustmaster or were my previously used pedals fixed once before? I was hoping for quick connects for the wires... Am I going to have to buy a soldering kit to fix the pedals?

Also, does anyone know if the Basher Boards Pedal Filter works on T500 pedals? They mention clubsports and logitech pedals but not thrustmaster? Here's the link - http://www.basherboards.com/PF1
It looks like the filter would be a nice cheap fix for spiking pedals...
 
Very usefull thread and comments. thanks a los to everyone. The tutorial is amazing.

I had this problem like ten years ago with my G25 on the break pedal, I cleaned the potentiometers with a needdle and a tiny pice of cloth I atached to it and some circuit cleaning spray (dielectric) I sold it a year ago to a friend, still working fine. Now my G29 had the same issues with the throttle and I did the same, its working fine.

I will recomend to try to clean the potentiometers trough the little cleaning window they had before trying opening them completely. Most of the time that will solve the problem for a long period of time, the cleaning spray will leave a dust repelling coat.

Now, if the problem is back after a short while, like less than a month, then maybe its better to open the potentiometers completely, because its posible some dirt or something is stock inside, but IMO thats rarely the case and shall inly be atempted as a las resort, specially because the brushes might loose flexibility after you let them distend.

In any case, I'll think this are good advices:

1.-Be very careful with the cables, both when openning and reassembling the case. I almost cut the clutch cable when putting back the olastic cover. The cables are loose inside and there are a lot of things that might crush or cut them.

2.-Cover the little cleaning window with blue tape or something when done, to ensure less dust will enter and thus a more durable period before having to clean them again.

3.-Dielectric Contact cleaner (spray) whatever method you use, eventually they migh get dirty again (the static charge will make particles paste in the contact surface) thats why spraying dielectric circuit cleaner is very important. Otherwise even if you ooen everything they will get dirty again.
I tried looking for it on Amazon for posting a link but couldn't find it. I'm sure any PC shop, electronic hardware stire, or maybe ebay shall have it, costs like 5usd.

4.- If you use the niddle and cloth method, be sure to cover the needle properly with the cloth so you don't scrub the metal surface directly with the needle. First spray some cleaner, then scrub carefully the metal contact surface inside the PMeter, move the pedal position (no need to undo them) and repeat on several pedal positions. Finally spray las coat.

5.-Apply the cleaner carefully, spray a small amount from 20cm (8") away or more, it will evaporate immediately and then repeat, thats the proper way. the wrong way to apply it, is when you press the hell out of the can like an inch away and drown the circuits, because that will low the temperature to quickly and water condensation will form, which will in time ruin the metal surface you're trying ti clean, plus the cleanning wont work because it will take to long to evaporate and it won't cristalice the grease, thus getting rid of it, witch is the whole point of this thread

PS
I wish this gide and thread existed ten years ago, I spend several days trying to find out what was wrong whit my G25 till I finally discover that cleaning the potentiometers was all I needed to do.

PS bis
Sorry if I wrote something wrong, English is not my first language, or even the second for that matter :P
 
Last edited:
My setup is in the basement so it is a very high humidity environment, which is the worst condition for pots, causes the internal surfaces to oxidize fairly fast, then they don't make great contact and you get the spiking. The pots lasted much longer when they were up in the house.
I have used this DeoxIt stuff and it seems to work well on the pots. No need to disassemble the pot itself, just open up the pedals, spray a bit in the opening in the pot, work the pot through its range of motion several times, repeat this whole thing a few times. Usually seems good for a year or so in my basement.
https://www.amazon.com/gp/product/B00006LVEU/?tag=gtplanet-20
 
Hello,
Excuse my ignorance and laziness, but do you think an air blower could do the job?!
I mean if I take it to a gas station where they have those very powerful air blowers (to fill the tires etc.) and use it to clean the pedals and the pot from the outside without opening it.
Do you think that might work?
Do you think there's any risk of damaging the parts due to very powerful air pressure/flow?
Thx
 
Last edited:
banner.jpg


Welcome to my tutorial showing how to clean your Logitech G25/G27 Pontentiometers!
Lets get straight to the subject!
I ADVISE YOU TO READ THE WHOLE GUIDE BEFORE YOU DO ANYTHING!
YOU ARE DOING THIS FIX AT YOUR OWN RISK


Video version:
*Now with a HD step by step tutorial!


Text version:
★ Getting your pedals out of the casing

1. Using the 2.5mm Allen wrench (Hex key), unscrew the 6 screws that hold the pedal covers.

DSC01787.jpg


2. Now flip your pedals over , and remove all the 14 screws using a Philips screw driver.
Bare in mind there are 2 hidden ones under the carpet flap.

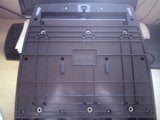
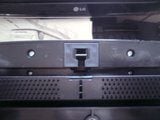
3. Now flip your pedals over once again, and remove the top cover.
After that using the Philips screwdriver, remove the 2 screws that are holding
the cable in the casing. After that put the top cover aside.


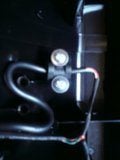
4. Now what you want to do is flip the assembly over so that its sitting on the pedals,
and remove all the 12 screws using the Philips screwdriver.


5. Now what you are left with are the pedal units. They are factory labelled A, B and C.
Before you unplug the cables from the pedals, label them first.
So that you know which one is which when your putting it back together.

I made a little diagram if you accidentally forgot to label the cables.
PEDALDIAGRAM.jpg


★ Cleaning the Pontentiometers

First of all let me say that you want to be very carefull when you are dealing with the pontentiometers.

1. Take the pedal that that you want to clean the pontentiometer in, and using a 10mm Flat wrench and a Allen wrench (Hex key)
(can't remember what size sorry :( ). Undo the 2 bolts that are holding the pedal in its housing.

DSC01807.jpg


2. After that what you should be left with, is just the pedal housing.

DSC01553.jpg


3. Using a cloth, clean the housing from the dust. After that we get to the point where it gets a bit harder.
Using a flat screw driver you want to bend the silver flap that holds the pontentiometer in place.

Untitled-4.jpg


4. After you bend the silver flap, you want to carefully take everything off the bolt. Remember in what order the parts go on. When you get to the spring, you want to remember how it sits there, so that you know how to put it back on. When you get to the bolt nut, unscrew it.

DSC01560.jpg


5. When you took all of that off, you want to take the pontentiometer off the housing.

DSC01561.jpg


6. Now carefully using a flat head screwdriver, you want to bend the 4 silver flaps that are holding the pontentiometer cover in place.
Do it slowly and carefully, because the last thing that you want to do is brake them.

DSC01569.jpg


7. Now take a good luck at the assembly of the pontentiometer because you want to know how to put it back later.
After you take the pontentiometer apart you should have 4 seperate parts.
The ones below, plus the silver housing that I dont have a picture off.
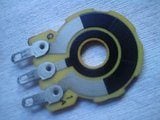
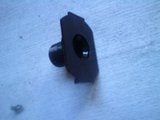

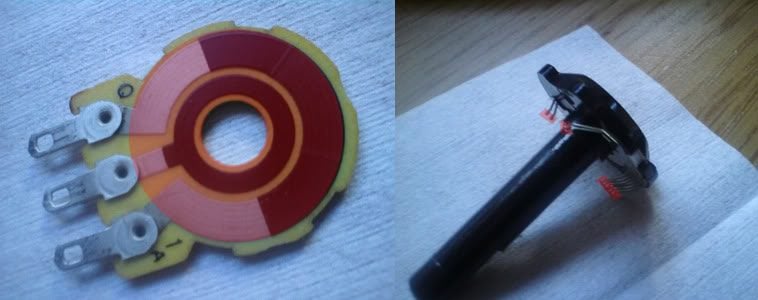
8. Now using some kind of degreaser/cleaner what you want to do is clean the parts that I have selected in red.
You should see be able to see black stain on the cleaning cloth that you are using.
(Area that needle moves on, and the tip of the needles that touch the surface)
Untitled-5.jpg


9. After you have done that, you can now put the pontentiometer back together. Remember to carefully
bend back the silver flaps that hold the pontentiometer together.

DSC01569.jpg


10. After that, put the pontentiometer back in the casing, tight the nut back to the bolt. Put the rest of the parts back and check if it's working fine by moving the part that is connected to the pedal and seeing if the needle in the pontentiometer moves at the same time. Then put the pedal back in the casing, remember to aline the teeth that move the pontentiometer. Tight everything back together by reading the guide backwards.

The end, if you have done everything correctly your pedals shouldn't spike anymore! Thank you for reading and I hope I have helped, plus can I just add that English is not my first language and something might not make sense :(

Any feedback very appreciated. 👍


Ok heres where i look stupid what is a pedal spike...any chance you might be able to help me my pedals r working like button all 3 pedals full on or off nothing in between..
 
The accelerator on my G29 started flickering at 100% throttle over the weekend. Found the video here and it proved very useful.

The G29 pot is almost identical, and using this guide I took it apart cleaned it and the pedal works perfectly again. Thanks.
 
Hello,
Excuse my ignorance and laziness, but do you think an air blower could do the job?!
I mean if I take it to a gas station where they have those very powerful air blowers (to fill the tires etc.) and use it to clean the pedals and the pot from the outside without opening it.
Do you think that might work?
Do you think there's any risk of damaging the parts due to very powerful air pressure/flow?
Thx
You will clear out dust but you wont clean the pots that way. You need to get fluid into them to dissolve the contamination on the connections.

The guide from the OP is great but you won't always need to go that far with your tear down. Just opening up the cover and spraying contact cleaner into the pots and moving the pedals a few times will do the trick for most people - I did mine about a year ago and they still work fine now.

I used WD-40 branded contact cleaner:

https://www.amazon.co.uk/dp/B00KPUBO2S/?tag=gtplanetuk-20
 
I'm having this issue with my G29, the throttle is spiking.
I tried spraying a contact cleaner (ABRO) into the potentiometer and it helped, but a few days later, after a hotlap in Assetto Corsa, I noticed on the gas graph (in the logger data) that the throttle still blips at 100% a little. I guess I have to open the pot and clean it properly...
Yeah I have that too and I know many do.
Once it gets dirty after the first time, it seems it keeps getting dirty in a much faster rate. I blow some air from the outside in the pedals openings (without opening the pedals). It gives me good results for a night and I have to do that again later on. Seems it's the way to go for me as I don't want to keep opening them all the time.
 
As I said above I can't open my pedals because one of the hex bolt is loose. So what I do is preventative maintenance. Vacuum and blow compressed air into the pedal housings once a week. Spray contact cleaner at least once a month (more if it starts spiking earlier). Cover the pedal assembly with a plastic bag when not in use to reduce dust buildup. Serves me pretty well so far. I'm even thinking of putting a cling wrap around the parts of the pedals that are open to reduce dust entry even further, although I'm not sure if that will affect the pedal movements.
 

Latest Posts

Back