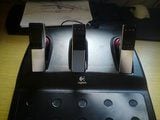
SPIKING PEDALS FIX: Clean your Logitech G25/G27 Pedal Pontentiometers

  • Thread starter iNs3CuRe
  • 106 comments
  • 206,187 views
I opened the pot, cleaned and assembled it back. No more spiking.
But, it seems that I closed the silver flaps not firmly enough and there's a little backlash. I occasionally get a costant 2-3% open throttle. It's not a problem in most sims on PC, like Assetto Corsa, where you can easily set a deadzone. But in GT Sport, you can't.

Just tested it in GTS - no problems. Perhaps there's a default deadzone that covers my backlash.
Anyway, be caferul to secure the pot cover and housing firmly (and at exact same angle as they were before) so they don't move where they shouldn't.
 
banner.jpg


Welcome to my tutorial showing how to clean your Logitech G25/G27 Pontentiometers!
Lets get straight to the subject!
I ADVISE YOU TO READ THE WHOLE GUIDE BEFORE YOU DO ANYTHING!
YOU ARE DOING THIS FIX AT YOUR OWN RISK


Video version:
*Now with a HD step by step tutorial!


Text version:
★ Getting your pedals out of the casing

1. Using the 2.5mm Allen wrench (Hex key), unscrew the 6 screws that hold the pedal covers.

DSC01787.jpg


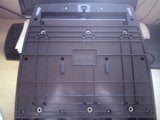
2. Now flip your pedals over , and remove all the 14 screws using a Philips screw driver.
Bare in mind there are 2 hidden ones under the carpet flap.


3. Now flip your pedals over once again, and remove the top cover.
After that using the Philips screwdriver, remove the 2 screws that are holding
the cable in the casing. After that put the top cover aside.


4. Now what you want to do is flip the assembly over so that its sitting on the pedals,
and remove all the 12 screws using the Philips screwdriver.


5. Now what you are left with are the pedal units. They are factory labelled A, B and C.
Before you unplug the cables from the pedals, label them first.
So that you know which one is which when your putting it back together.

I made a little diagram if you accidentally forgot to label the cables.
PEDALDIAGRAM.jpg


★ Cleaning the Pontentiometers

First of all let me say that you want to be very carefull when you are dealing with the pontentiometers.

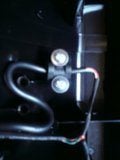
1. Take the pedal that that you want to clean the pontentiometer in, and using a 10mm Flat wrench and a Allen wrench (Hex key)
(can't remember what size sorry :( ). Undo the 2 bolts that are holding the pedal in its housing.

DSC01807.jpg


2. After that what you should be left with, is just the pedal housing.

DSC01553.jpg


3. Using a cloth, clean the housing from the dust. After that we get to the point where it gets a bit harder.
Using a flat screw driver you want to bend the silver flap that holds the pontentiometer in place.

Untitled-4.jpg


4. After you bend the silver flap, you want to carefully take everything off the bolt. Remember in what order the parts go on. When you get to the spring, you want to remember how it sits there, so that you know how to put it back on. When you get to the bolt nut, unscrew it.

DSC01560.jpg


5. When you took all of that off, you want to take the pontentiometer off the housing.

DSC01561.jpg


6. Now carefully using a flat head screwdriver, you want to bend the 4 silver flaps that are holding the pontentiometer cover in place.
Do it slowly and carefully, because the last thing that you want to do is brake them.

DSC01569.jpg


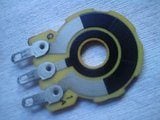
7. Now take a good luck at the assembly of the pontentiometer because you want to know how to put it back later.
After you take the pontentiometer apart you should have 4 seperate parts.
The ones below, plus the silver housing that I dont have a picture off.


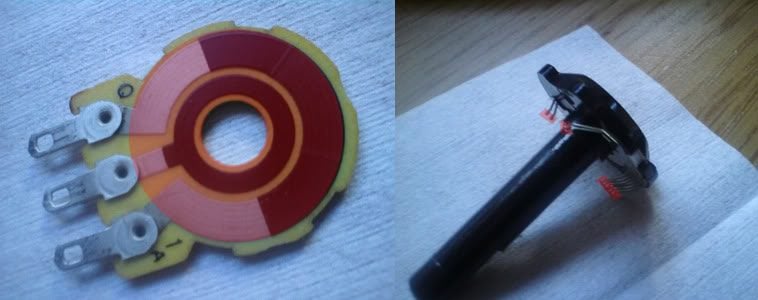
8. Now using some kind of degreaser/cleaner what you want to do is clean the parts that I have selected in red.
You should see be able to see black stain on the cleaning cloth that you are using.
(Area that needle moves on, and the tip of the needles that touch the surface)
Untitled-5.jpg


9. After you have done that, you can now put the pontentiometer back together. Remember to carefully
bend back the silver flaps that hold the pontentiometer together.

DSC01569.jpg


10. After that, put the pontentiometer back in the casing, tight the nut back to the bolt. Put the rest of the parts back and check if it's working fine by moving the part that is connected to the pedal and seeing if the needle in the pontentiometer moves at the same time. Then put the pedal back in the casing, remember to aline the teeth that move the pontentiometer. Tight everything back together by reading the guide backwards.

The end, if you have done everything correctly your pedals shouldn't spike anymore! Thank you for reading and I hope I have helped, plus can I just add that English is not my first language and something might not make sense :(

Any feedback very appreciated. 👍


Thank you for all your effort put into this tutorial, it helped me a lot.
I couldn't even race anymore with those spiking pedals, it looked like i had contaminated fuel or something like this .
 
Just did this to an old G29 pedal set that I'd given up hope on, and initial results show that it seems to have worked rather well. Time will tell however.

It's dead easy to do, the most awkward part being those silver retainers that hold the gear on the shaft, and it only took around an hour for all three pedals.

A couple of things I would suggest:

1st - when removing the gear from the potentiometer shaft keep the spring attached to the gear if possible. This will save time when reassembling as you won't need to fiddle around getting the spring reattached to the gear

2nd - when re-attaching the metal housing bend the lugs back into position and then use a small hammer and a flat punch tool to ensure that the lugs hold the plastic backing plate/shaft sleeve securely. Just bending then back may not secure everything adequately.
 
Hi, I used this tutorial to clean my accelerator pedal for my G29, but I can't seem to get the spring/gear position correctly. Either I get acceleration without the pedal being pressed, or it is somehow delayed(100% is around 3/4 of the pedal, at Max pressed I get only 25-50% acceleration input). Can anyone have a look and tell me what would be the spring position on the gear for the accelerator?

Thanks!
Did you figure it out? I just cleaned and reassembled mine this morning. I had the same concerns, but I think put it back correctly. I found the lowest pedal tooth and lowest pot tooth needed to be together. Btw, I never took the pot apart or off the base metal piece.
 
Yes, finally. Good decision, I could not put the metal casing back and fixing tightly enough - under pressure the potentiometer was moving a bit and generating the effect described in the last post.

As I was completely fed up after almost 3 days of trying - I just took the potentiometer from the clutch, as I am not using the clutch at all. I put on the clutch the potentiometer from accelerator, but on testing it was keeping the clutch input almost always on, so you could not do anything.

Permanent solution was to disconnect the clutch pedal completely, wrap the connectors from it in duct tape(separately, one by one, as if they are touching between them the wheel will completely cut power to the pedals) and now I can race again.

I am a bit pissed, as I probably lost any warranty, but I look on the good side: when I will get in DIY mode I can try to install some upgrades on it :).
 
Just did this yesterday and it went very well. Originally I thought that because the problems started when i started driving without TCS it was me and my foot. I tried lifting off, pressing it harder, even 2 feet on the throttle pedal..aaaaaaaahhhh, then after seeing this post the problem was solved, so thank you very much. The hardest part is getting the little metal flaps off without damaging them or yourself. Feels like a new car now. Ive had the pedals about 2 years of average use and inside the pot the contacts were really black.
 
A great guide.👍 I finally took the plunge and tried this for my G29 throttle pedal last night as every few weeks or months I find that the anti-skid light flickers and I lose speed unless I jab firmly on the pedal after lifting completely to let it spring back . So far it has appeared to do the trick.:D

It was tempting to do it for theother pedals,but I haven't noticed any issues with braking and I never use the clutch pedal, so i didn't want to tempt fate by taking them apart too - nervous enough waiting to see if the throttle worked when I plugged the pedals back in again!

Oh, and if anyone needs to refill a mattress, I have a tonne of dust from inside my pedal casing you can have!;)
 
Last edited:
I find having the pedals covered with a bin bag, when not in use, helps keep the dust out, when they do need cleaning, I spray in the pots with contact cleaner and dry with a hairdryer.
 
Sorry for digging up the thread, but I have exactly the same problem.

I have taken aparat both brake and accelerator pedal, but I have problems only with brake one. When I'm playing Dirt Rally 2, brake can spike to 20% without even touching it and it stays that way until I won't press it again. It ruins the game, because it's kinda hard to drive when somebody is pushing brake pedal all the time.

Anyway, here's the photo of my brake pedal and potentiometer on it. I haven't taken it off, because I heard I can just spray it with electric cleaner. But I don't know which spot I should spray exactly, could someone help me with this?

5NWUXxl.jpg


RNx1ozw.jpg


Should I spray it inside the potentiometer, from that side? You all say that you just have to spray the "pot", but I have no idea what a pot is. English is not my native language and it's kinda hard for me to guess this one. If someone could help me or even mark the spot on my images, I would be really grateful.
 
upload_2021-1-25_20-13-6.png


You might want to consider putter a piece of tape on that indicated hole after you applied the contact spray to prevent dust / dirt from entering the potmeter. Yours seems rather clean.

See the thing as a record player.
 
Last edited:
Thank you for response. Tomorrow will be the judgment day :) If spraying won't help, I think I will replace it with the clutch as I wasn't using that one too much.
 
Last edited:
Should I spray it inside the potentiometer, from that side? You all say that you just have to spray the "pot", but I have no idea what a pot is. English is not my native language and it's kinda hard for me to guess this one. If someone could help me or even mark the spot on my images, I would be really grateful.
Yes, that's the right spot to spray. While it's still damp inside rotate the bit that has the teeth on it backwards and forwards through it's complete range of movement to help the cleaner get to spread to all contact points.

Pot is just short for potentiometer.
 
I made the whole operation and I can call it success!

I cleaned with an electric clean all pots, used some compressed air to blow up dust and reassembled them.
They are working now like a charm and I'm pretty happy about it. Glad it worked out.

Thank you everyone for helping me with this :)
 

Latest Posts

Back