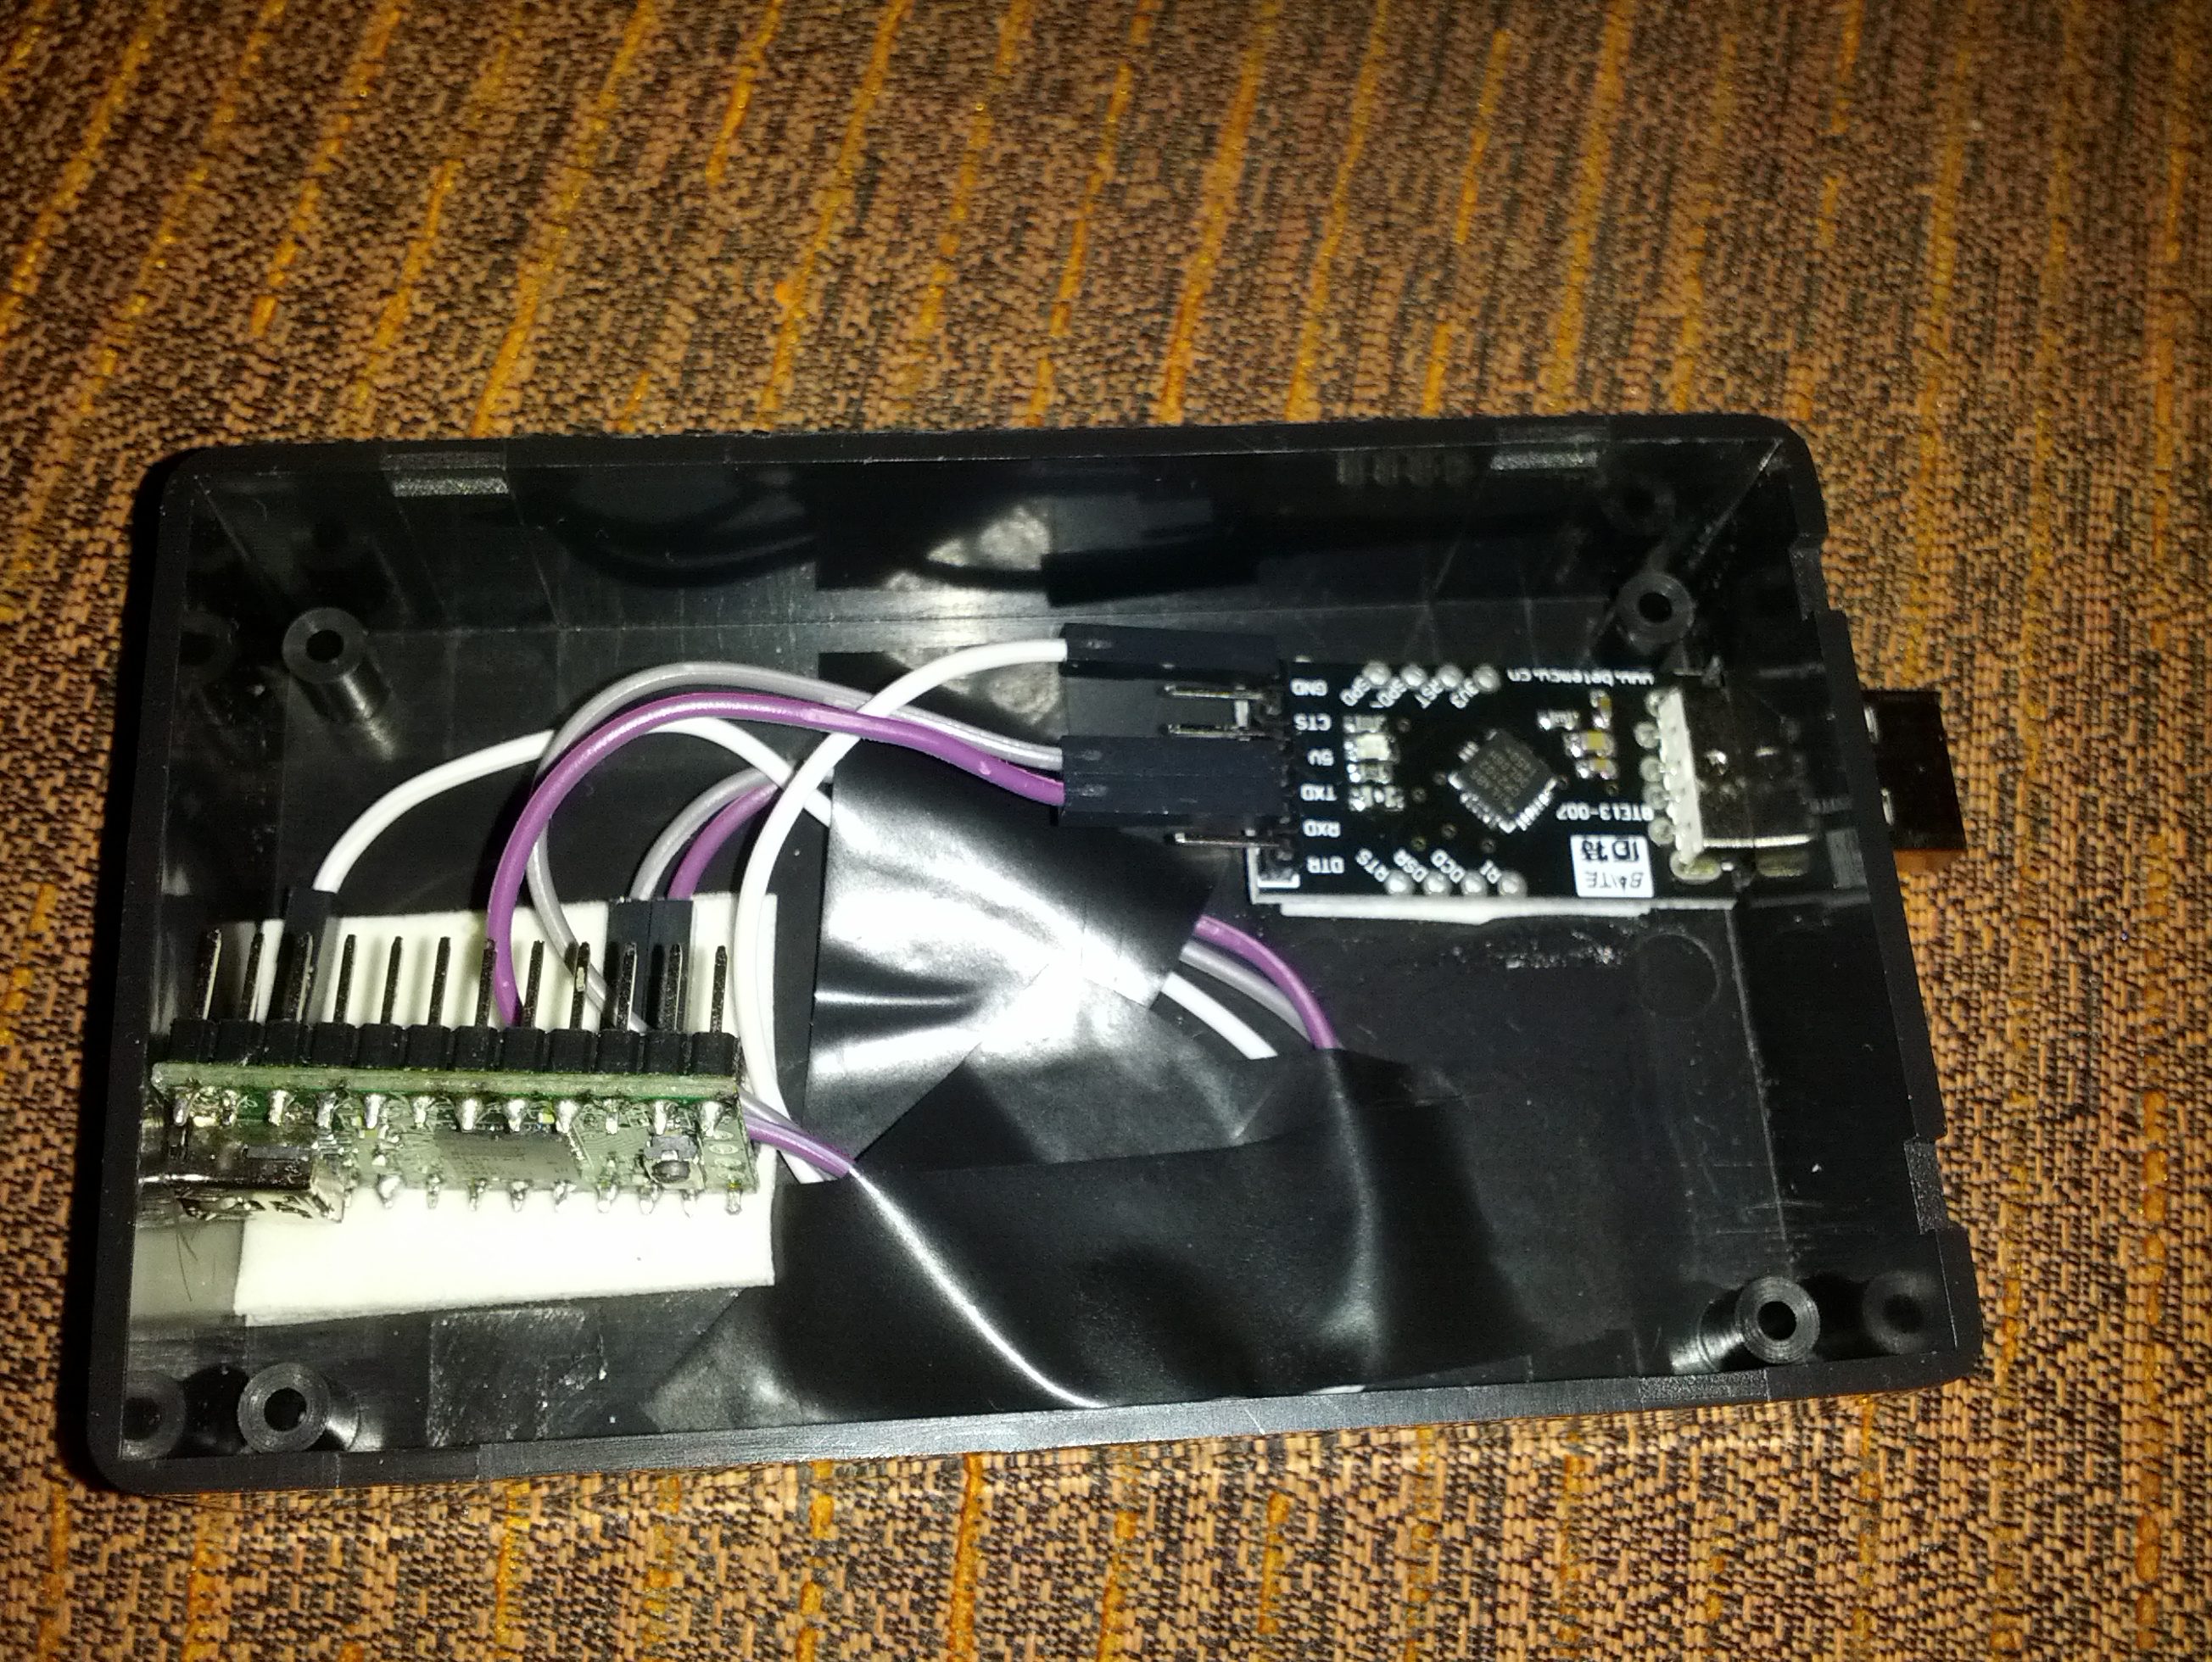
The meat and potatoes of the DIY adapter should be like this (assuming that you went the non-soldering route), but as mentioned in the attached snippet I included below, your "USB to UART board" connections could be different pins then the picture shows. Just make sure you locate the actual pins for GRD, RXD, and TXD, and then connect those accordingly. The Teensy pins should be the same if you align it as shown in the picture (USB mini connection pointing up/away from you).
I got the pic from:
http://gimx.fr/wiki/index.php?title=DIY_USB_adapter_for_dummies
I used this guide to set up my adapter. It will also guide you through the basics of setting up the Teensy board. The Teensy setup is a one time quick in painless operation if you don't plan on changing the device you use the adapter with. I took a snippet of more of the actual screen and uploaded that as well.
I also referenced this link to set up the teensy board:
http://www.pjrc.com/teensy/loader.html
Most of the page just runs you through testing out the loading process. Actually loading the firmware you'll need for your setup to work is only a couple of steps. I would suggest referencing the link if the GIMX guide doesn't give enough detail for your liking.


